You can happily have your website or web shop with another service while keeping the domain and email with Sitewig. You only point the website (yourcompany.com and www) elsewhere. MX records and mailboxes stay where they are.
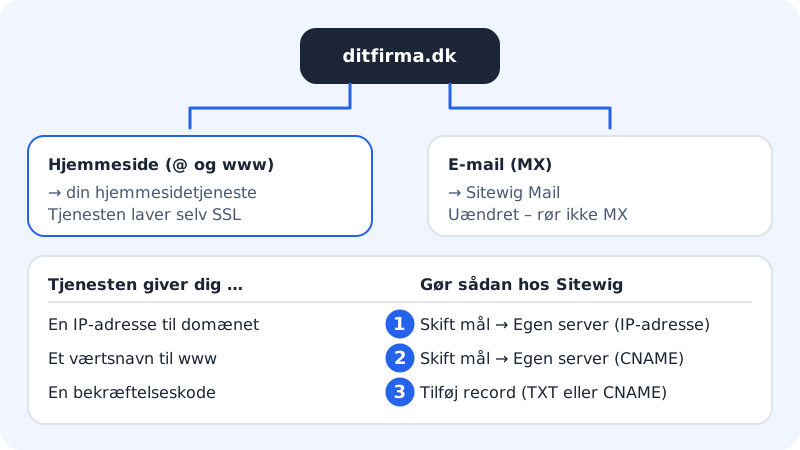
Find the values at the service
Log in to the service and find the guide for connecting a custom domain bought elsewhere (often called connect manually or pointing). Note down:
- Whether www should point to a host name (CNAME), e.g. an address ending in the service's domain.
- Whether the domain itself should point to one or more IP addresses (A records).
- Whether there is an extra verification code (TXT or CNAME).
Set it up at Sitewig
Step 1: Open Change target
Choose Domains → My domains, click the domain and tap Change target.
Step 2: Choose Own server (CNAME) – recommended
If the service gives you a host name for
www, choose Own server (CNAME) and enter the host name in Host name. Sitewig pointswwwthere, and visitors toyourcompany.comwithout www are sent on towww.yourcompany.com.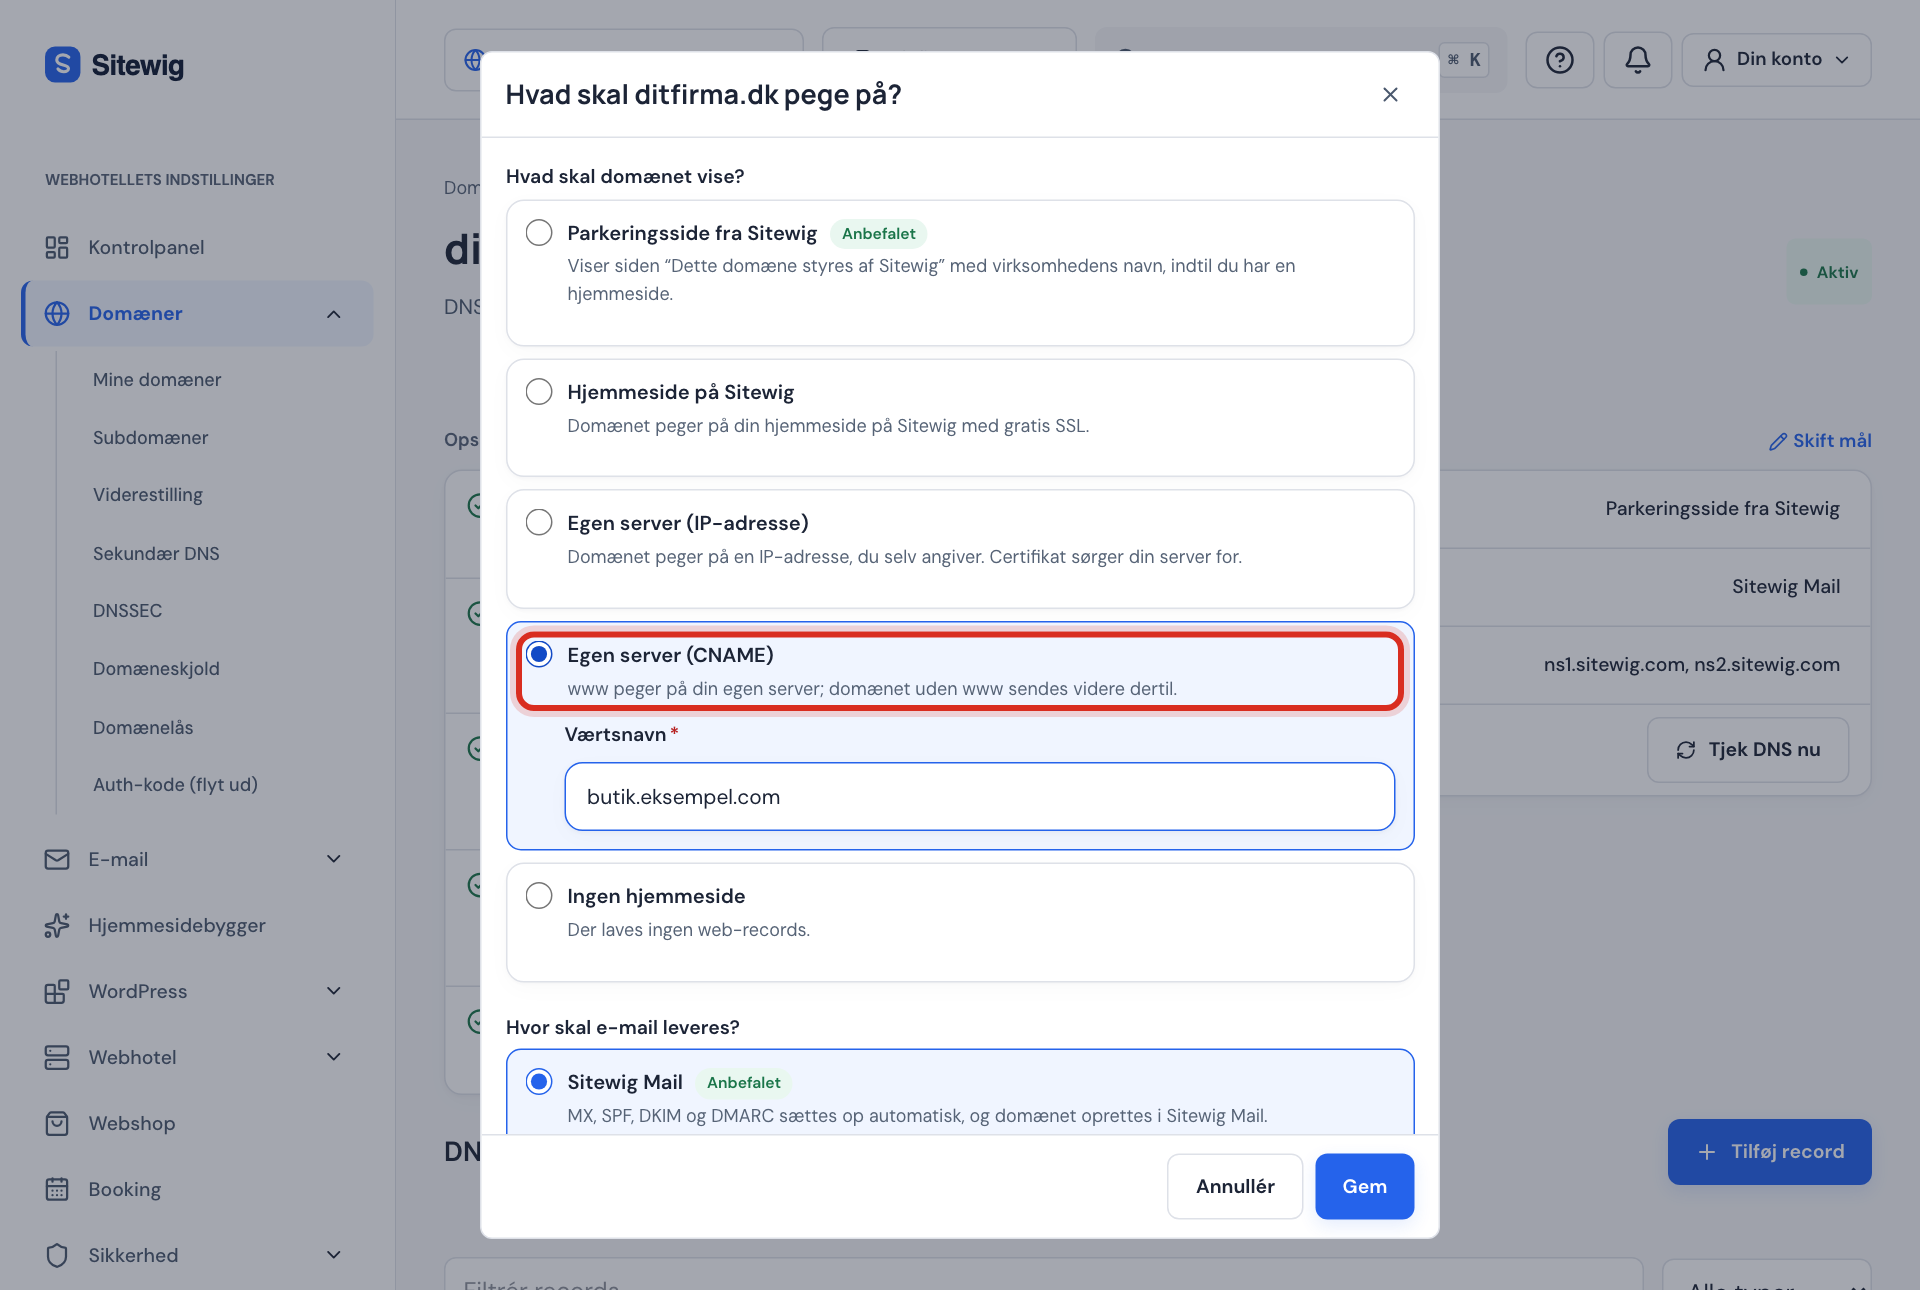
Own server (CNAME): www points to the service Step 3: … or Own server (IP address)
If the service gives you only an IP address, choose Own server (IP address) and enter it in IPv4 address. The domain itself gets the IP address, and
wwwfollows as an alias.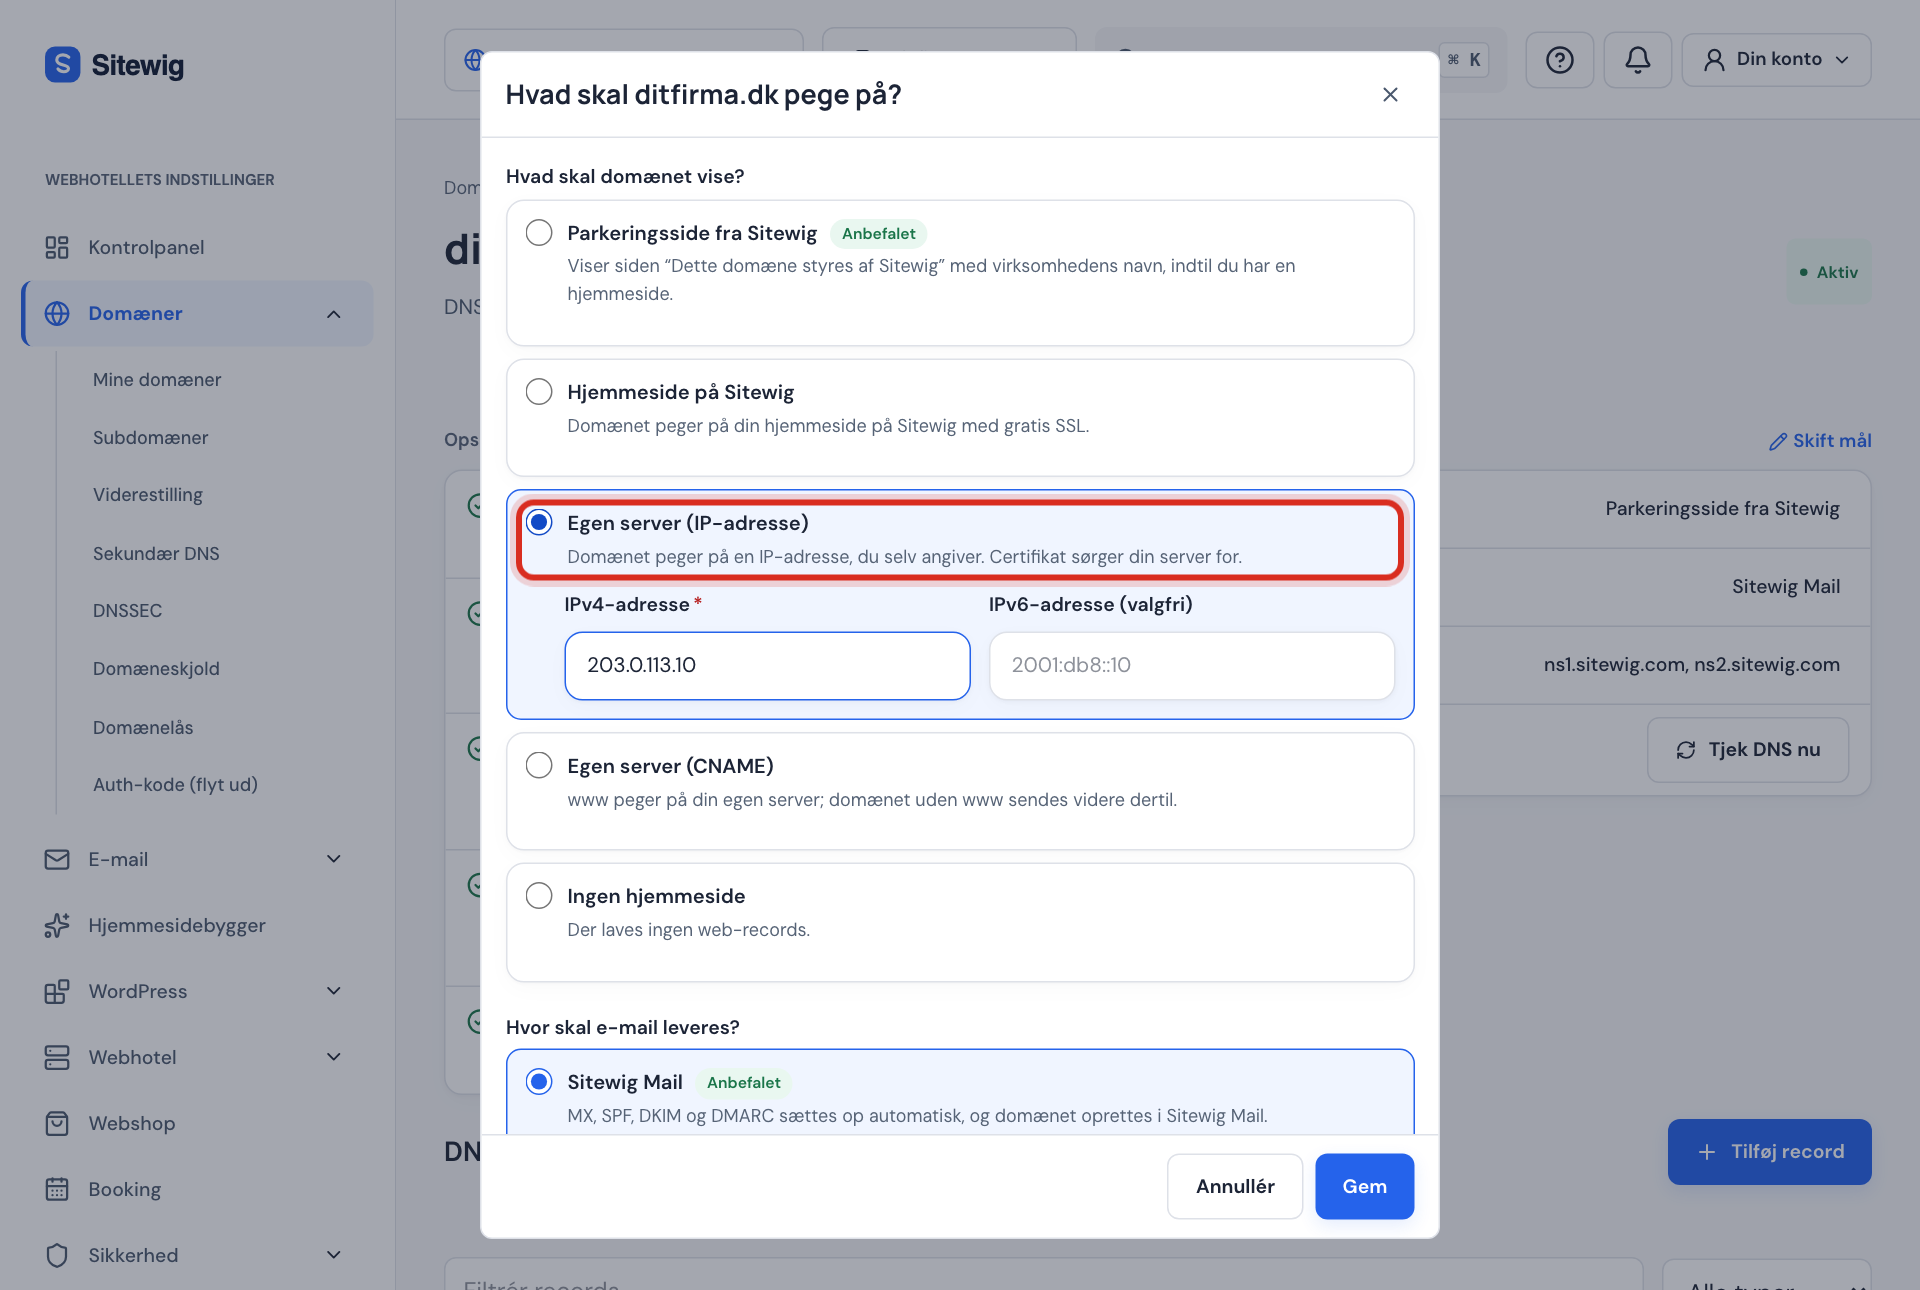
Own server (IP address): the domain points to the service's IP Step 4: Leave email alone
Do not touch the setting under Where should email be delivered? Tap Save.
Step 5: Add the verification code
If the service has given you a code, scroll down to DNS, tap Add record and create it as TXT or CNAME with exactly the name and value the service shows. See TXT records and CNAME.
Step 6: Confirm at the service
Go back to the service and ask it to check the domain. The service issues the SSL certificate itself. The change at Sitewig reaches the name servers within a few minutes.
What you cannot do yet
Manually, you cannot have both a specific IP address on the domain itself and a CNAME to the service on www – only the one-click setup can do that. If the service asks for both, choose Own server (CNAME): the website works on both yourcompany.com and www.yourcompany.com, but some services show a warning that the domain without www does not point directly to them. You can ignore it.
Frequently asked questions
Will my email still work?
Yes. Change target only changes the website as long as you leave the email setting alone. Your MX, SPF, DKIM and DMARC records are unchanged.
Who takes care of SSL?
The service you point to. Sitewig removes its CAA record when the domain points to your own server, so the service is free to issue its certificate.
How do I switch back to a website with Sitewig?
Tap Change target and choose Website on Sitewig or Parking page from Sitewig. Sitewig adjusts the web records and SSL automatically.