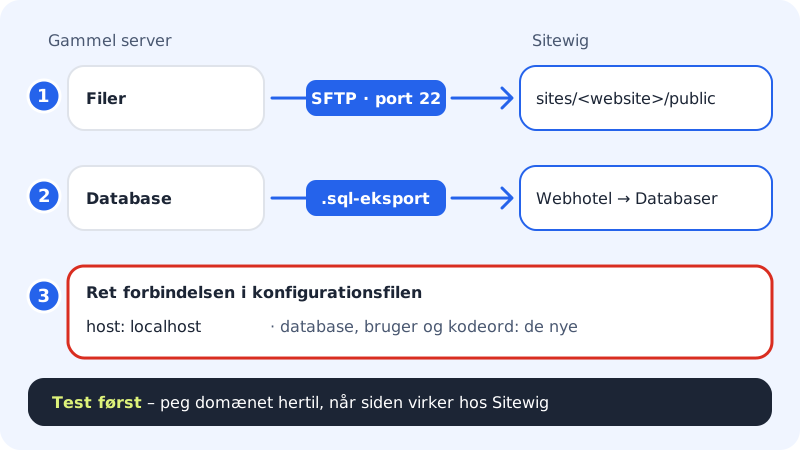
If your website is made in plain HTML, PHP or a system other than WordPress, there is no automatic move. You move it yourself in three parts: the files, the database (if the site has one) and the connection between them. It takes a little technical experience – otherwise you can use the free migration help included in the web hosting plans.
Before you start
- Create a website at Sitewig for the site to live on.
- Have access to the old server via SFTP or FTP, and to the database (for example phpMyAdmin).
- Download a copy of everything to your own computer first. That way you also have a backup.
The connection to the web hosting
Connection with SFTP
- Protocol
- SFTP (recommended)
- Server
- The host name under Web hosting → SSH/SFTP
- Port
22- User name
- The FTP user's name
- Folder for your files
sites/<website>/public
Ordinary unencrypted FTP is turned off. In FileZilla, choose SFTP – or FTP with Require explicit FTP over TLS (port 21). See Connect to your web hosting with FileZilla.
Move the site
Step 1: Download the files from the old server
Log in to the old server with a program such as FileZilla, and download all files from the web folder (often
public_html,wwworhtdocs).Step 2: Export the database
If the site has a database, export it as a
.sqlor.sql.gzfile, for example with phpMyAdmin → Export. Also note which file on the site contains the database connection (for exampleconfig.phpor.env).Step 3: Create an FTP user at Sitewig
Go to Web hosting → SSH/SFTP, and press Create FTP user. The password is only shown once – save it straight away. The page shows Server, which you need to log in.
Step 4: Upload the files
Upload all the files to the
sites/<website>/publicfolder, where<website>is the name of your website. You can also use Web hosting → Files in the browser for small changes.Step 5: Create and import the database
Go to Web hosting → Databases, create a new database, and save the user name and password. Import the
.sqlfile with the database tool. See Import a database (SQL file).Step 6: Correct the connection
Open the site's configuration file, and change the database connection to the new values at Sitewig. The host is always
localhost. See Find the host name, port and user name for your database.Step 7: Test, and then point the domain
Check that the site works at Sitewig. Only then point the domain here – for example by changing the name servers to Sitewig and connecting the domain to the website.
Frequently asked questions
Can Sitewig move my site automatically?
There is no automatic move for HTML or PHP sites. You move them yourself as described above – or you write to us and get free migration help.
Can I use SSH?
Yes. SSH access is found under Web hosting → SSH/SFTP. With SSH you can, for example, unpack the files directly on the server.
Why does the site still show the old server?
The domain still points to the old provider until you change name servers or point the domain to your website at Sitewig. That is intentional – it lets you test in peace.