Google Search Console is Google's free tool that shows how your website performs in search – and whether Google has problems reading it. Before you can use it, you must prove that the website is yours. It takes a couple of minutes.
Choose how to verify
Search Console offers two types of property. You can choose the one that suits you best:
- URL prefix covers one address, for example
https://yourcompany.com. You verify with a code (HTML tag) that you paste into Sitewig. - Domain covers the whole domain with all subpages and
www. You verify with a TXT record in the domain's DNS.
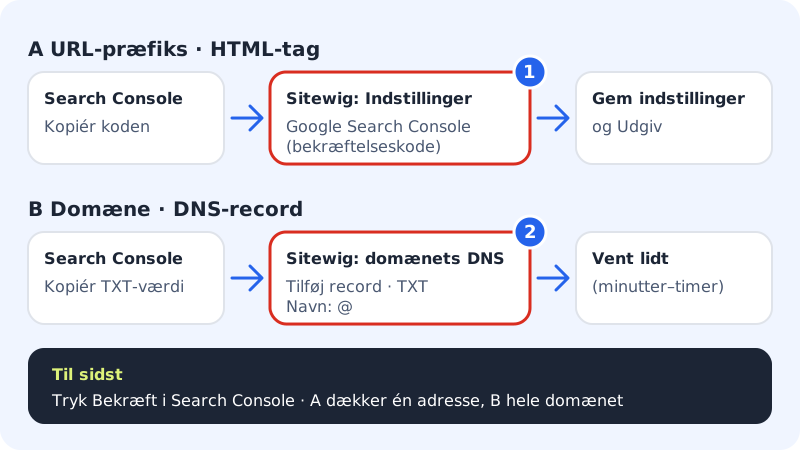
Route A: verify with an HTML tag
Step 1: Get the code in Search Console
Add a property of the URL prefix type, and enter the address of your website, for example
https://yourcompany.com. Choose the HTML tag verification method, and copy the meta tag Google shows.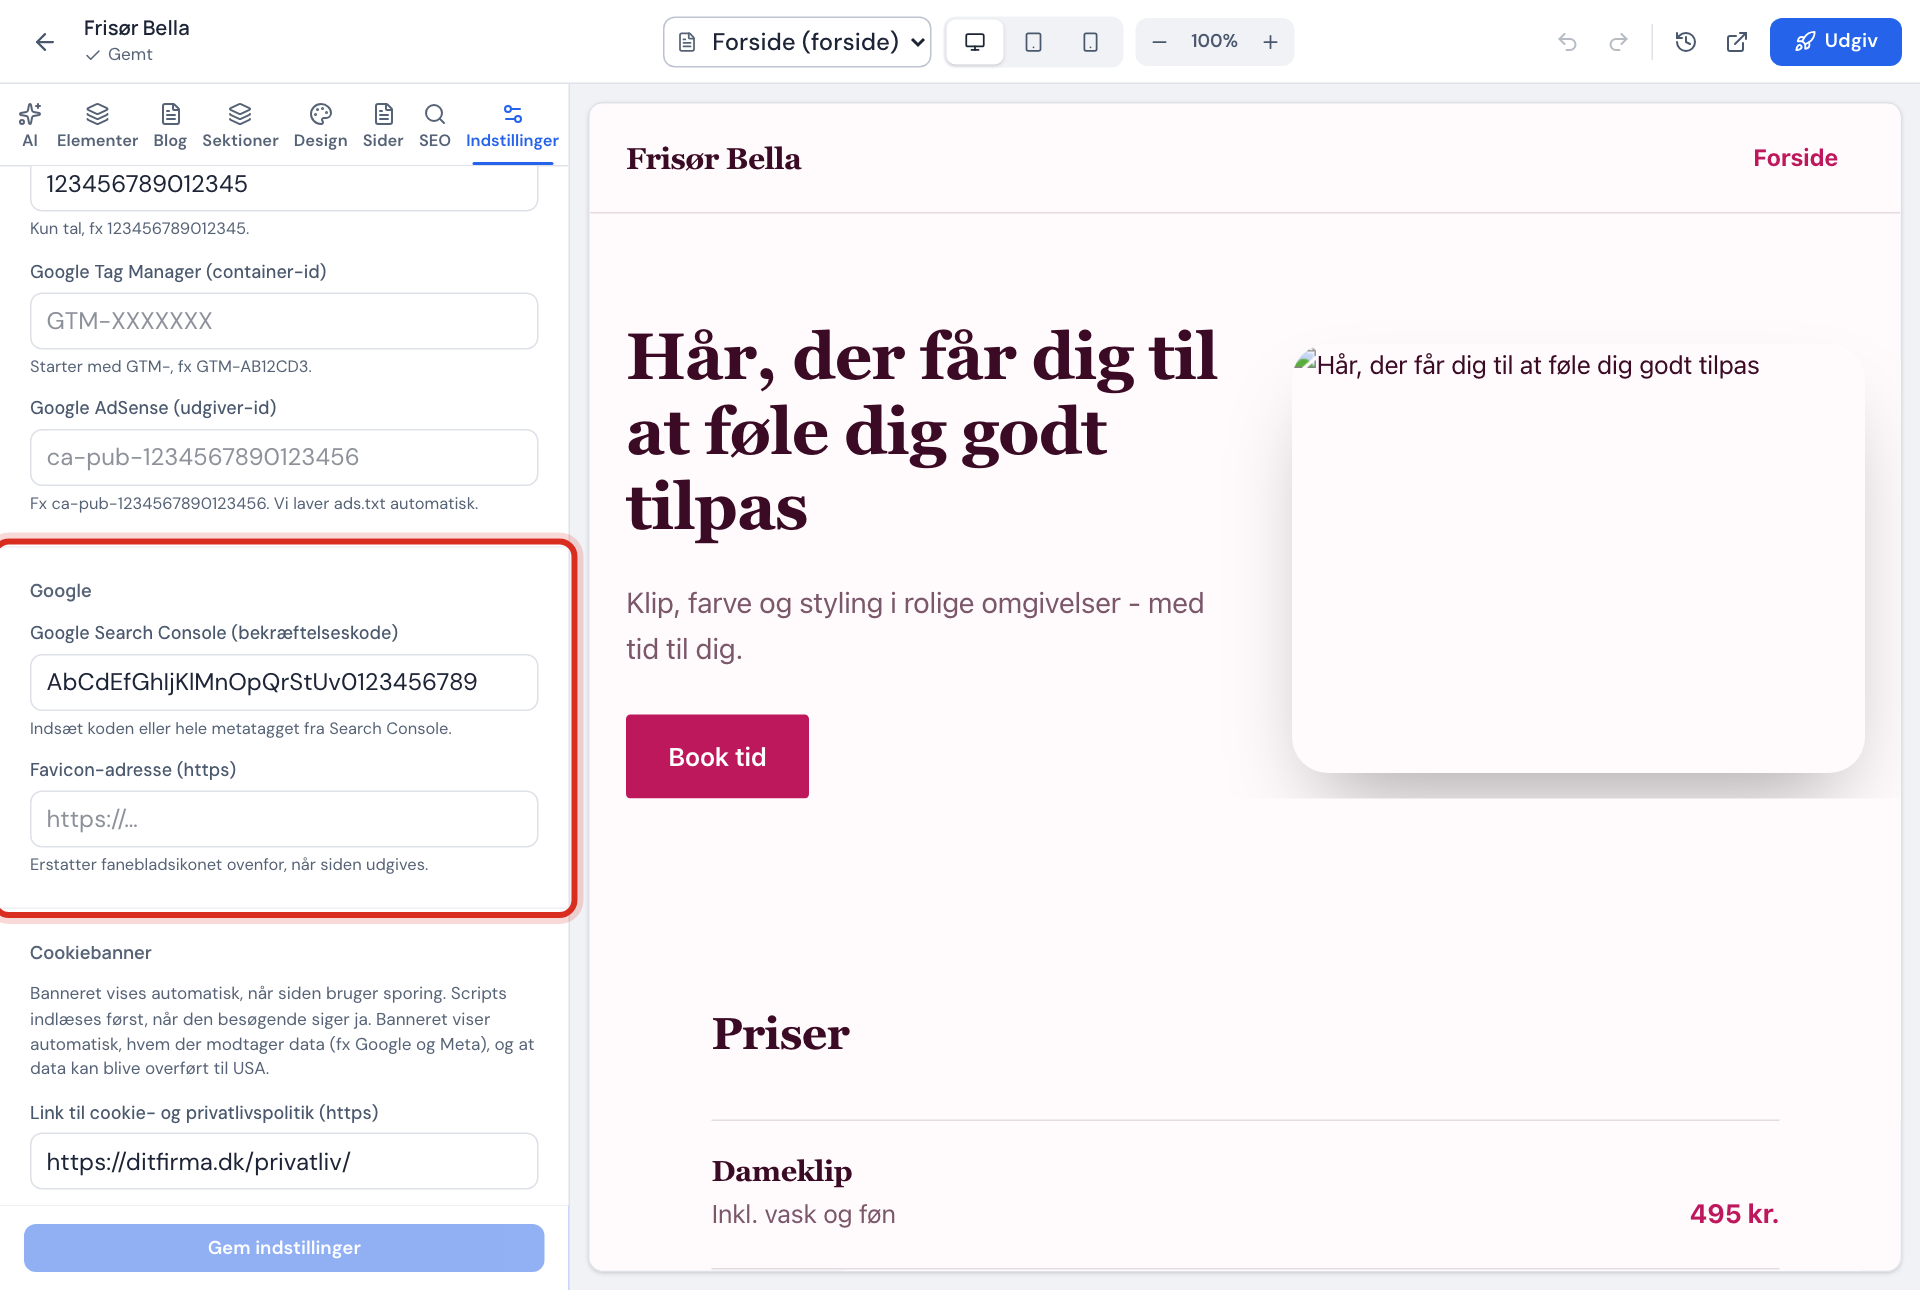
Step 2: Open the website settings
In the control panel, choose Website builder, and press Open editor next to your website. Go to the Settings tab, and scroll down to the Website settings section.
Step 3: Paste the code
Under the Google heading, paste the code into the Google Search Console (verification code) field. You can paste the whole meta tag – Sitewig extracts the code itself.
Step 4: Save and publish
Press Save settings. When it says Saved. Publish the site to use the changes., press Publish at the top of the editor. The code is only added to the site when you publish.
Step 5: Verify in Search Console
Go back to Search Console, and press the button to verify. If it does not work, wait a few minutes and try again.
Route B: verify with a TXT record
If your domain is with Sitewig, you can verify the whole domain instead:
- Choose the Domain property type in Search Console, enter
yourcompany.com, and copy the TXT value. It usually starts withgoogle-site-verification=. - In the control panel, go to Domains → My domains and click the domain.
- Scroll down to the DNS section, and press Add record. Choose the TXT type, leave the name as
@(the domain itself), and paste the value. - Save, wait a little, and press verify in Search Console.
Submit your sitemap
When the website is published, Sitewig automatically creates the sitemap.xml file with all the pages Google may show. Pages with Hide the page from Google turned on are left out. Sitewig also creates robots.txt, which tells search engines where the sitemap is.
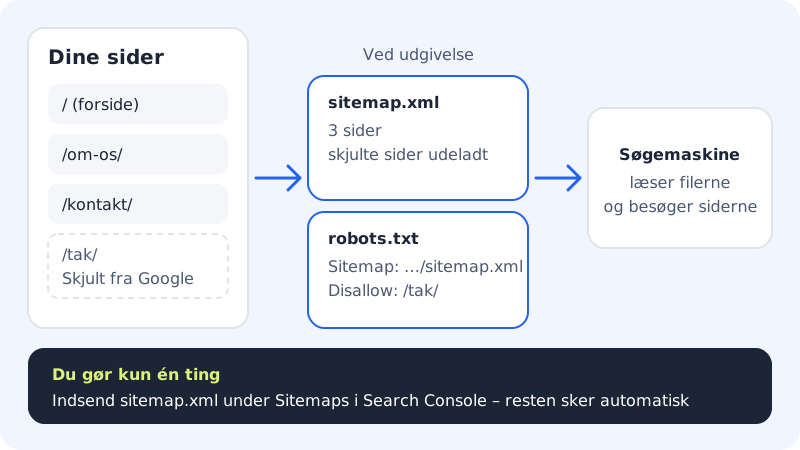
Step 1: Open Sitemaps in Search Console
Choose your property, and find the menu item for sitemaps.
Step 2: Enter sitemap.xml
Enter
sitemap.xmlin the field for a new sitemap address, and submit. If your website has several languages, you still submitsitemap.xml– it points on to a sitemap per language by itself.Step 3: Check the status later
After a while, Search Console shows how many pages Google has found. The number should match the number of visible pages.
Files Sitewig creates for you
- Sitemap
https://yourcompany.com/sitemap.xml- Robots
https://yourcompany.com/robots.txt- Updated
- Every time you publish
Frequently asked questions
How long does it take before my pages are on Google?
That is up to Google. New pages are typically included within a few days to a couple of weeks, but there is no guarantee. A submitted sitemap makes it easier for Google to find them.
I cannot see the Google section under Settings?
The section is under the Settings tab in the website builder. If you cannot see it, you can use route B with a TXT record on the domain.
Do I need to do anything when I add a new page?
No. The sitemap is updated automatically every time you publish. You do not need to submit it again.