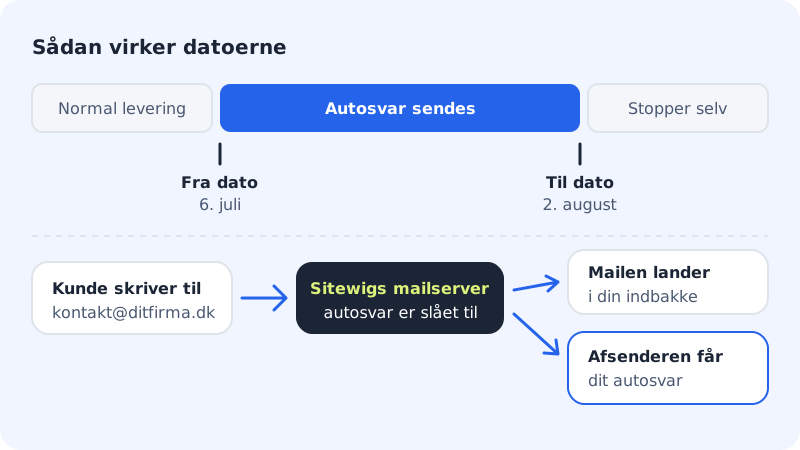
An auto-reply automatically sends a message back to everyone who writes to you – for example that you are on holiday, and who to contact in the meantime. The auto-reply runs on Sitewig's mail server, so it works even when your computer and phone are switched off. Incoming messages still land in your inbox as normal.
Turn on the auto-reply
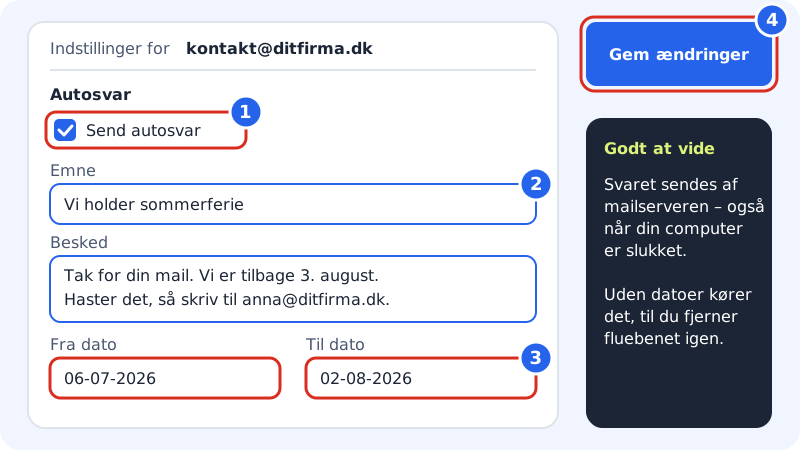
Step 1: Open Auto-reply for the mailbox
Go to Email → Mailboxes, click the menu button (the three dots) next to the address, and choose Auto-reply. The Settings for address drawer opens.
Step 2: Tick Send auto-reply
Under Auto-reply, tick Send auto-reply. The fields for subject, message and dates then appear.
Step 3: Write the subject and message
Fill in Subject (for example "We are on summer holiday") and Message. Write briefly when you will be back, and who to contact if something is urgent. The message is required – without it the auto-reply cannot be saved.
Step 4: Choose dates (optional)
Choose From date and To date if the auto-reply should start and stop by itself. The auto-reply is active from the start date up to and including the end date. If you leave the dates empty, it runs until you turn it off.
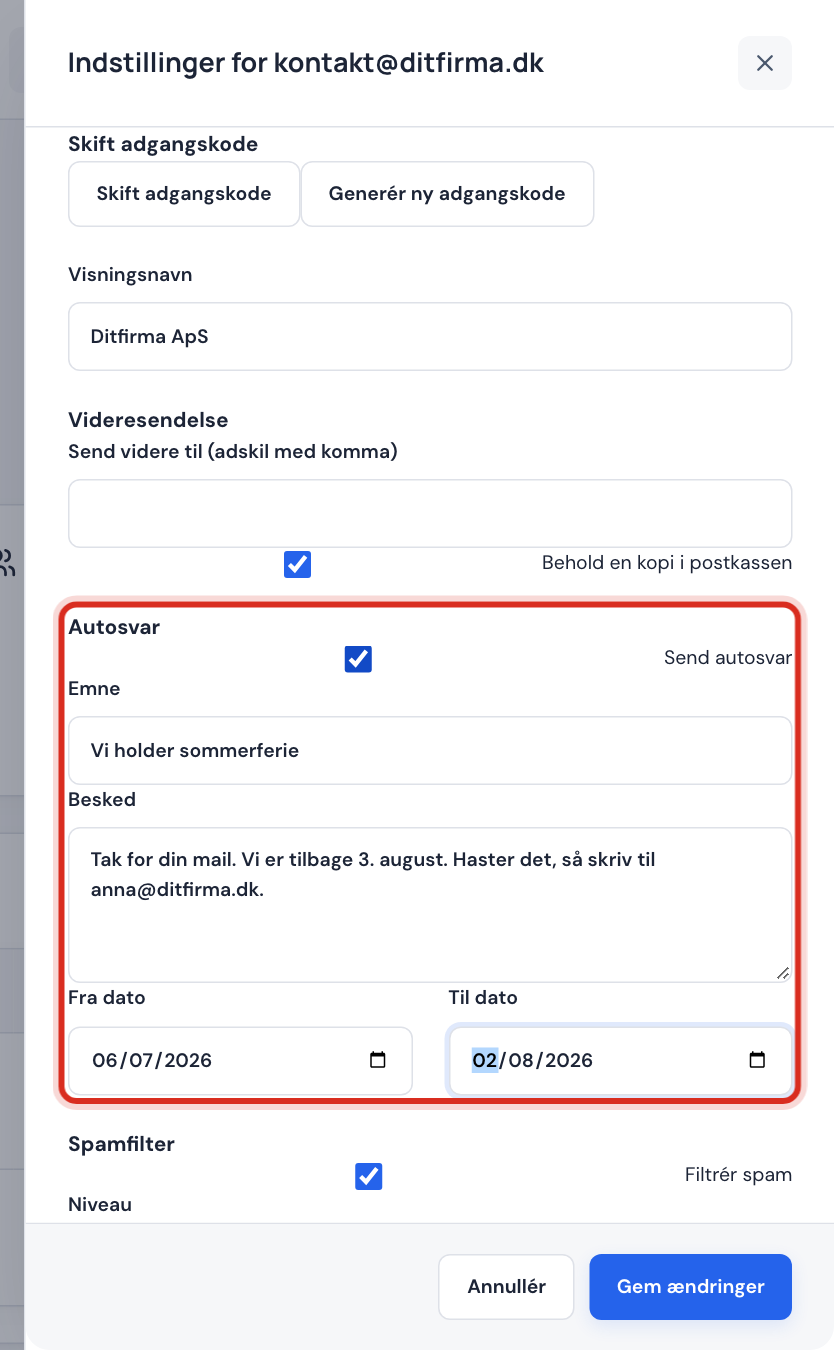
Auto-reply in the mailbox settings Step 5: Save
Click Save changes. If it says "The end date is before the start date.", correct the dates and save again.
Test the auto-reply
Send a message to the mailbox from another address while the auto-reply is active (if you have set a start date in the future, only from that day). You should get the reply back shortly after.
Turn the auto-reply off
If you have set a To date, the auto-reply stops by itself. Otherwise, open Auto-reply for the mailbox again, untick Send auto-reply and click Save changes.
Tips for the text
- Say when you will be back – and whether you will answer messages when you return.
- Mention a colleague or a shared address in case something is urgent.
- Avoid sensitive information, for example that your house is empty. The auto-reply is also sent to unknown senders.
Frequently asked questions
Does everyone who writes get an auto-reply every time?
Normally not. The mail server does not send the same auto-reply to the same sender again and again, so a customer who writes several times on the same day does not get their inbox filled with your replies.
Can I have both an auto-reply and forwarding?
Yes. You can turn on both in the same drawer and save them in one go. The sender gets the auto-reply, and the message is forwarded as normal – see Forward your email.
Does the auto-reply work if the mailbox is paused?
No. A paused mailbox receives no new email and therefore does not send auto-replies either.