When the name servers point to Sitewig, new email lands with us. But your phone and your email program still only know the old provider's servers. Until you switch them over, you will not see the new emails, and email you send may go via the old server. Step 6 Set up your devices in the moving guide collects everything you need. The step is optional, so the guide marks it Optional.
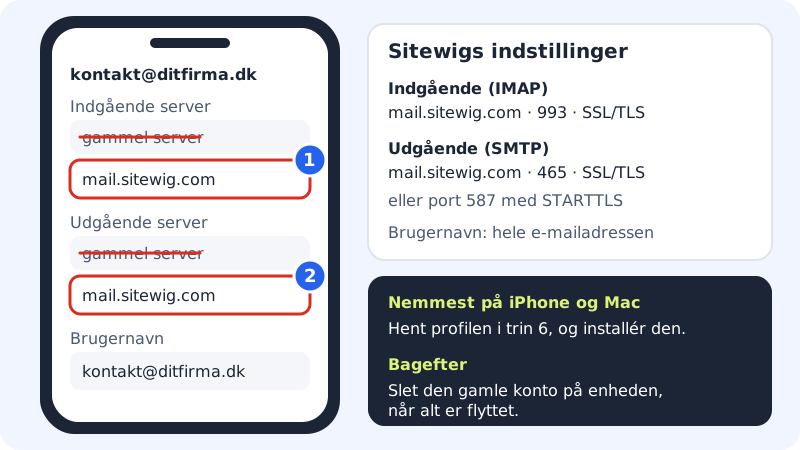
Sitewig's settings
Incoming server (IMAP)
- Server
mail.sitewig.com- Port
993- Security
- SSL/TLS
Outgoing server (SMTP)
- Server
mail.sitewig.com- Port
465- Security
- SSL/TLS
- Alternative
- port
587with STARTTLS - Require sign-in
- Yes, same username and password
Sign-in
- Username
- The whole email address, for example
contact@yourcompany.com - Password
- The mailbox's password at Sitewig, the one you chose in step 2
Set up your devices
Step 1: Choose the mailbox
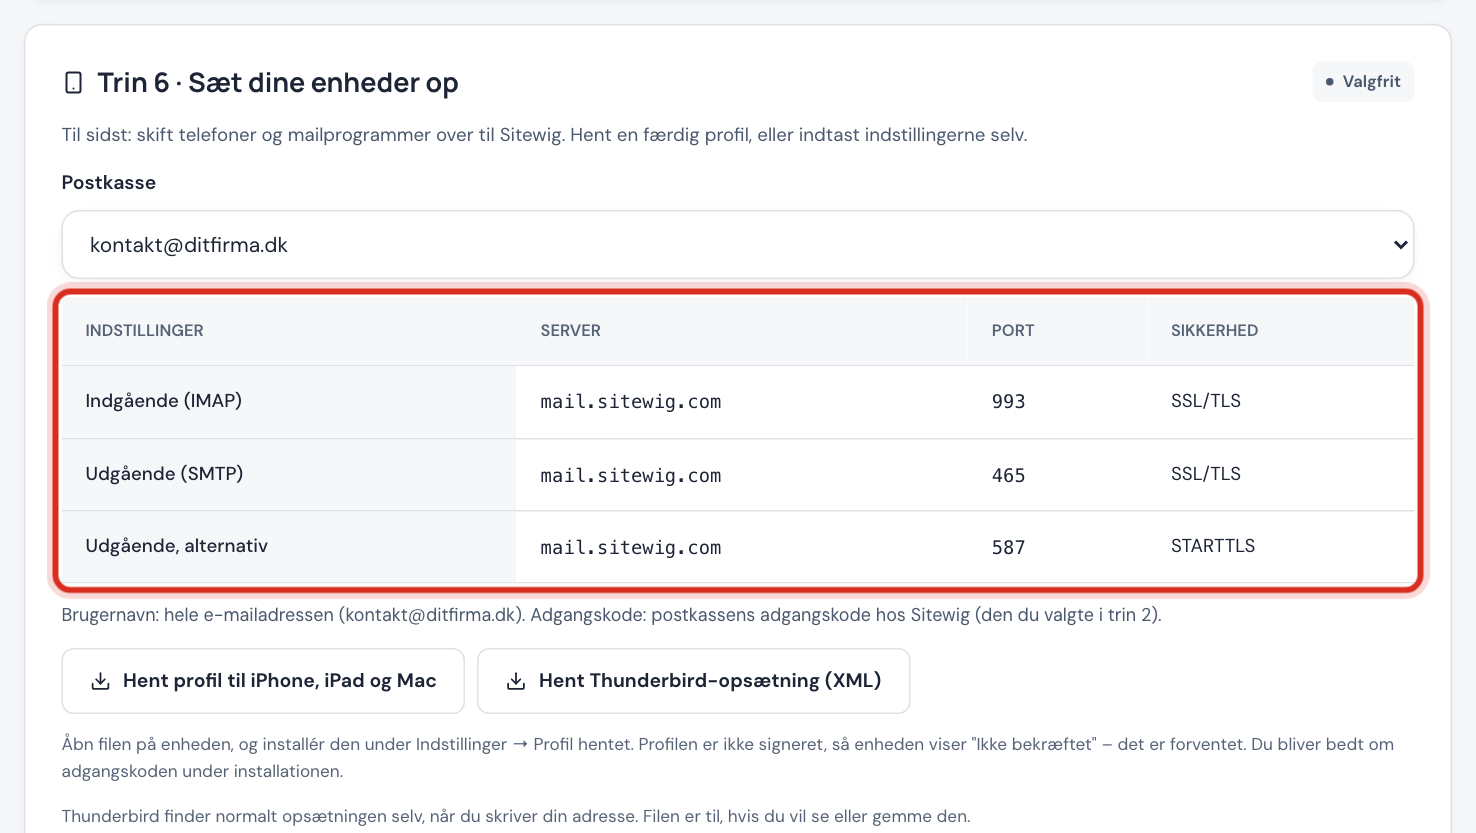
In step 6, choose the mailbox in Mailbox if you have more than one. The table shows Incoming (IMAP), Outgoing (SMTP) and Outgoing, alternative.
Step 2: iPhone, iPad and Mac: download the profile
Tap Download profile for iPhone, iPad and Mac, and open the file on the device. Install it under Settings → Profile Downloaded. The profile is not signed, so the device shows Unverified – that is expected. You will be asked for the password during installation.
Step 3: Other devices: enter the settings
Expand the instructions for your device under Step by step: iPhone and iPad, Android (Gmail app), Outlook or Thunderbird. Thunderbird normally finds the settings itself when you enter your address – otherwise you can tap Download Thunderbird setup (XML).
Step 4: Send a test email
Send an email from the new account to another address, and reply. If both directions work, you are ready.
Step 5: Remove the old account
Once all emails have been fetched with Fetch new email, delete the old account on the device. Otherwise the phone may keep sending via the old server.
Frequently asked questions
Why can't I see the new emails on my phone?
The phone is still fetching from the old server. Change the incoming server to Sitewig, or add the account again with the profile from step 6.
Can I keep the old account alongside?
Yes, for a while, if you want to be able to see old emails there. But delete it once everything has been moved, so that you do not end up sending from the old server.
Does the profile contain my password?
No. The profile and the Thunderbird file contain no password. You enter it yourself during installation.
I get a certificate warning. What now?
Check that the server name is exactly as in step 6. See Certificate warning.