If sales, the warehouse and new members of staff all need an address, you do not have to create them one at a time. With Create several you fill in a list and create all the addresses with one click.
Create the addresses
Step 1: Open Email → Mailboxes
Sign in, choose the domain in the domain picker and go to Email → Mailboxes.
Step 2: Click Create several
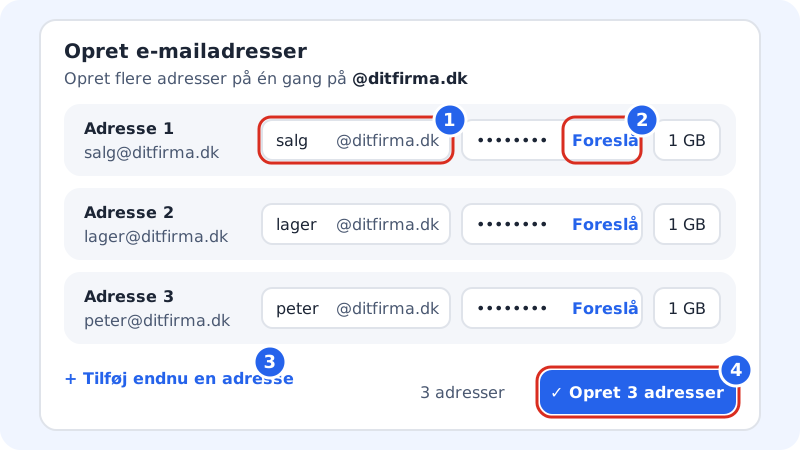
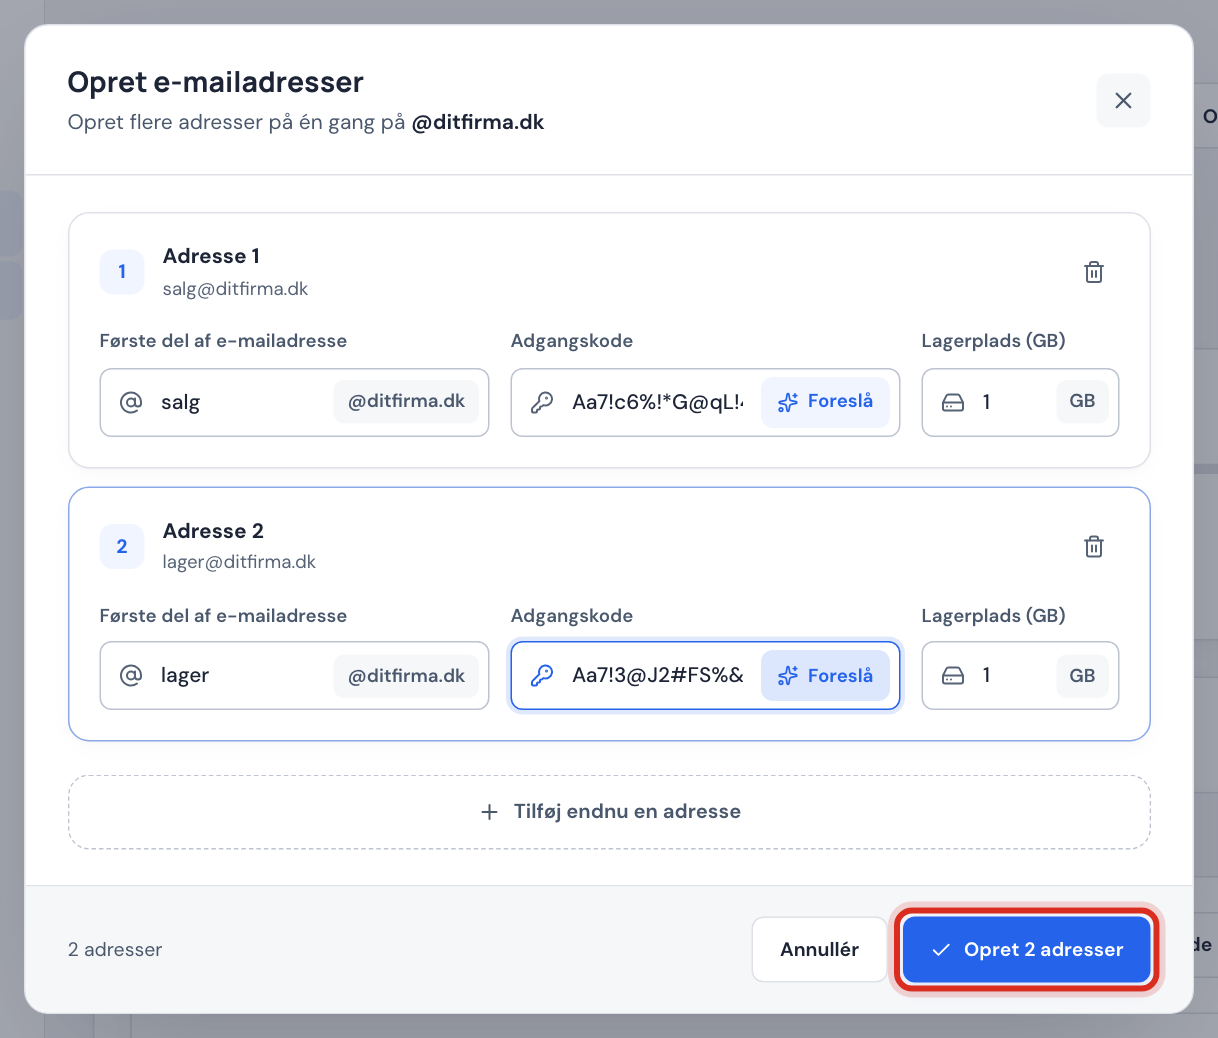
The button is at the top, next to New account. The Create email addresses window opens with two empty rows.
Step 3: Fill in one row per address
Enter the first part of the address in First part of the address, e.g.
sales. Above the field you can see the full address, e.g. sales@yourcompany.com. Enter a password of at least 12 characters with both letters and numbers, or click Suggest to get a strong password.Step 4: Add or remove rows
Click Add another address to get a new row. The bin icon on the right of a row removes it.
Step 5: Allocate the storage
If the rows show the field Storage (GB), choose the space for each address. If your plan has a shared pool, the total chosen and the space available are shown at the bottom of the window, e.g. 3 GB of 8 GB available.
Step 6: Create the addresses
Click the button at the bottom, e.g. Create 3 addresses. When it has gone through, it says how many addresses have been created.
If a row fails
The control panel checks the rows before anything is created and writes the error under the row concerned:
| Message | What to do |
|---|---|
| Invalid address. | Use only a–z, numbers and . - _ +, and start with a letter or number. |
| That address is already on the list. | You have entered the same address twice. Correct or remove one of the rows. |
| The address already exists. | There is already a mailbox with that address. Remove the row. |
| At least 12 characters. | The password is too short. Click Suggest or enter a longer one. |
| You have chosen more space than is available. | Reduce the storage on one or more rows. |
If an address only fails when it is being created (for example because your plan's limit has been reached), the others are still created. Only the rows that failed stay in the window, so you can correct them and try again.
Share the passwords securely
- Give each member of staff their own password: do not use the same one for everyone.
- Never send the password in an ordinary email to the new address. Use a shared password manager, for example, or tell them in person.
- The member of staff can change the password themselves later in Webmail, once they know the current one.
Frequently asked questions
How many addresses can I create at once?
There is no fixed limit in the window, but you cannot create more mailboxes than your plan allows. Starter gives 3, Pro 10, Business 25 and Essential 10, while Max and Unlimited have no fixed number.
Can I load a list from a spreadsheet?
No, not yet. The addresses are entered row by row in the window.
Why is the Create several button greyed out?
No domain has been selected, the domain does not deliver email to Sitewig Mail, or your plan's number of accounts has been used. See Create a new email address to fix it.