Your Sitewig email works in all the common email programs. Outlook and Thunderbird find the servers themselves when you enter your email address. In the other programs you enter the server details once: it typically takes 3–5 minutes per device.
What you need ready
- Your full email address, e.g.
contact@yourcompany.com - The mailbox password (not the password for the control panel)
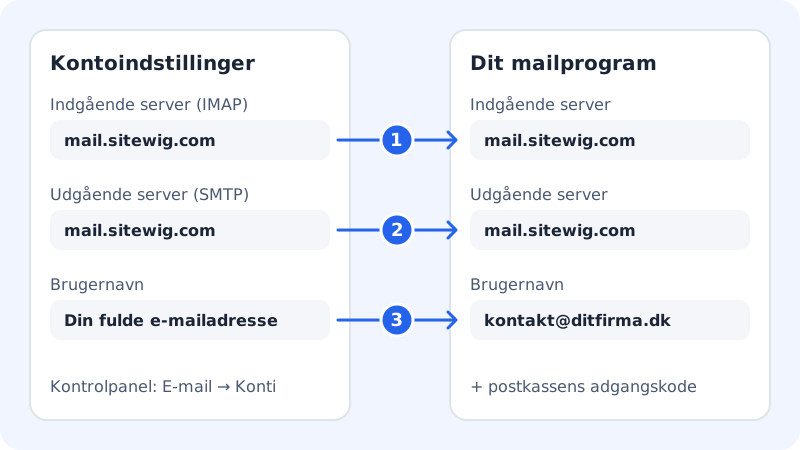
- The server name
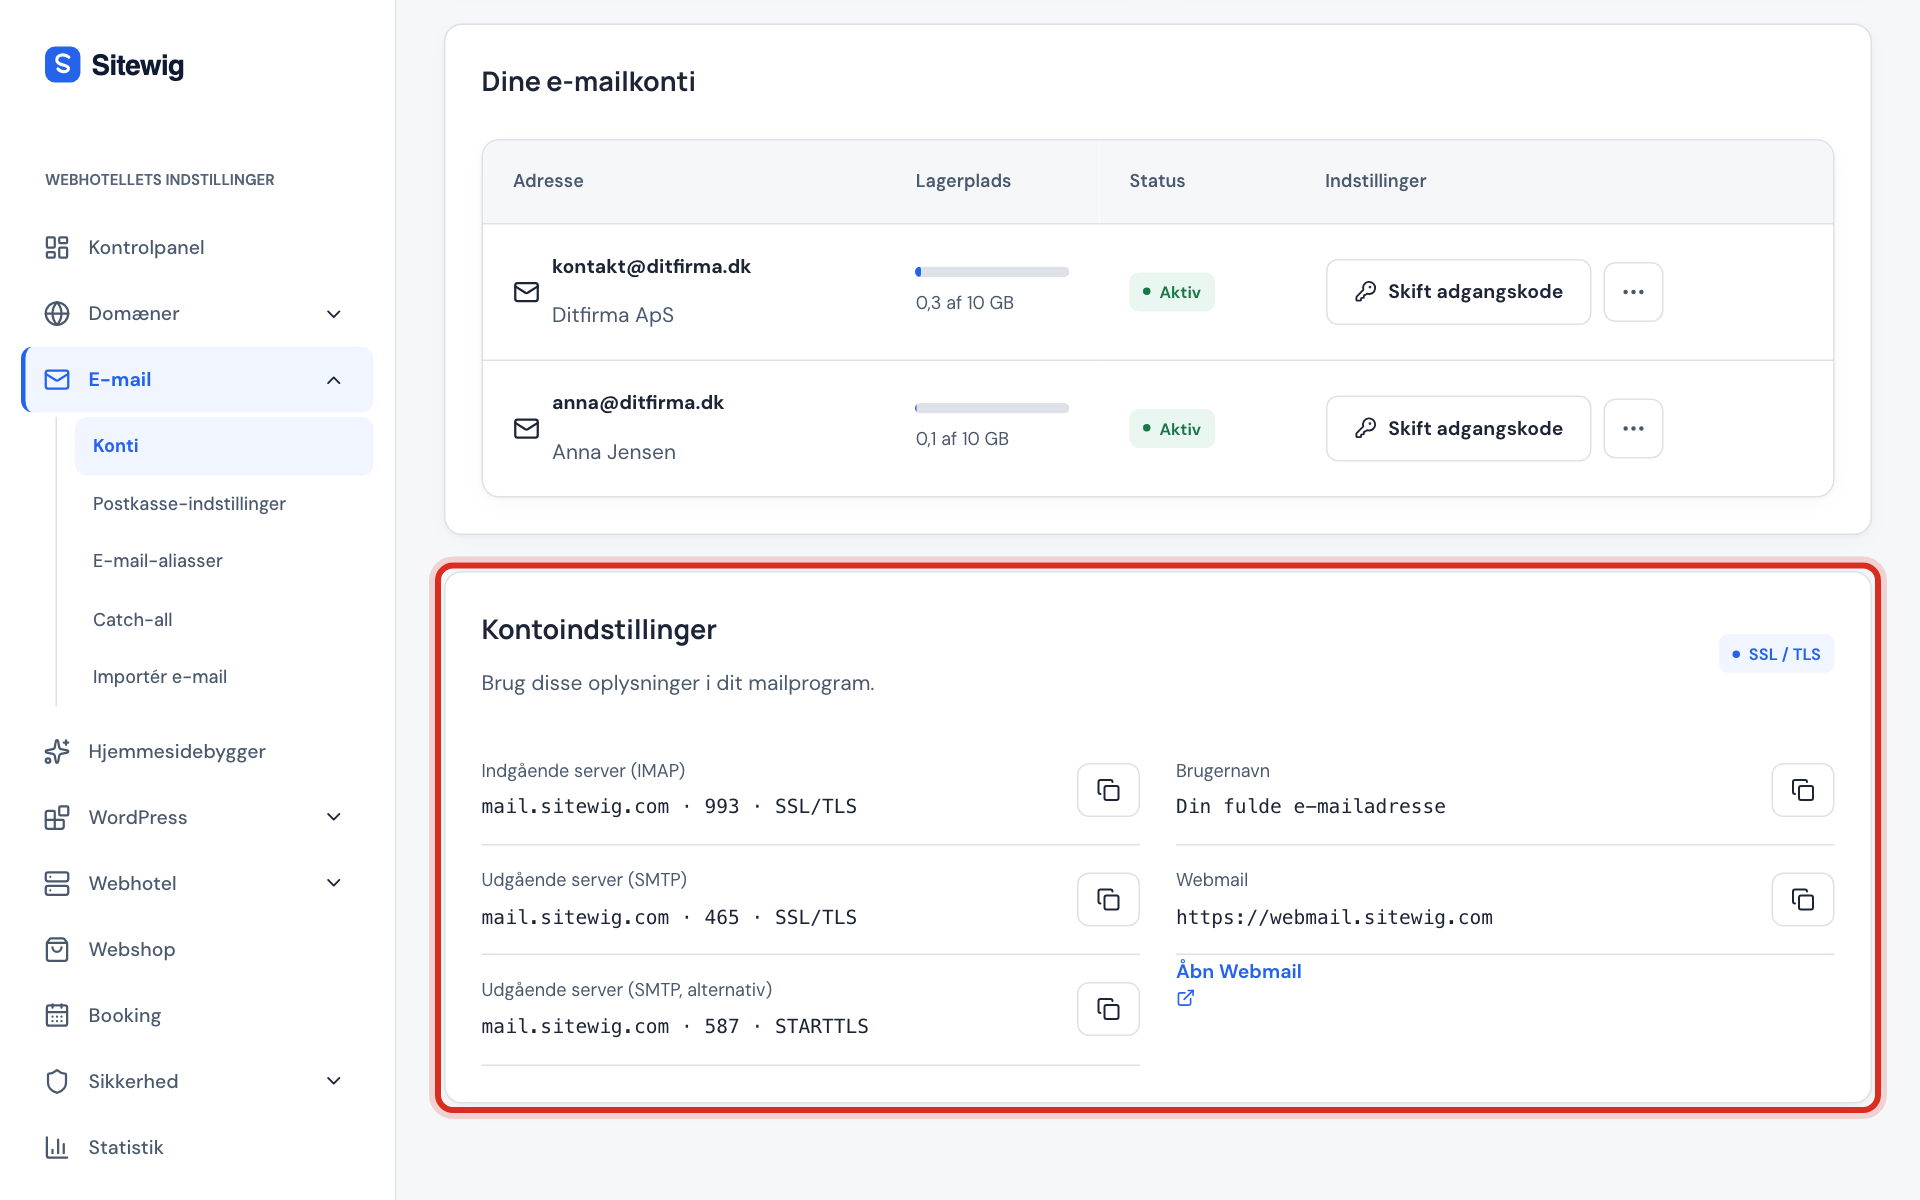
mail.sitewig.com: it is also shown in the control panel under Email → Mailboxes on the Account settings card
What you enter in every program
- Account type
- IMAP
- Incoming server
mail.sitewig.com, port993, SSL/TLS- Outgoing server
mail.sitewig.com, port465, SSL/TLS (or587, STARTTLS)- Username
- The whole email address
- Password
- The mailbox password
iPhone and iPad
Step 1: Add an account
Open Settings, go to Mail (on newer versions of iOS under Apps → Mail) and Mail Accounts, and tap Add Account.
Step 2: Choose Other
Tap Other and then Add Mail Account. Fill in your name, email address and password, and tap Next.
Step 3: Fill in the servers
Choose IMAP at the top. Enter
mail.sitewig.comas the host name for both incoming and outgoing mail, and the whole email address as the username in both places. Tap Next and Save.
You will find the detailed guide with pictures in Set up your Sitewig email on iPhone and iPad. Menu names may vary slightly between iOS versions.
Android (Gmail app)
Most Android phones use the Gmail app for other email addresses too. Menu names may vary slightly between phones and app versions.
Step 1: Add another address
Open the Gmail app, tap your profile picture and choose Add another account and then Other.
Step 2: Enter the address and choose IMAP
Enter the whole email address, tap Next and choose Personal (IMAP). Enter the mailbox password.
Step 3: Incoming server
The username is the whole address, the server is
mail.sitewig.com, the port is993and the security type is SSL/TLS.Step 4: Outgoing server
The server is
mail.sitewig.com, the port is465and the security type is SSL/TLS. Switch on Require sign-in and use the same username and password.Step 5: Finish
Choose how often the app should fetch email and give the account a name. Tap Next.
Outlook (Windows and Mac)
Step 1: Start the setup
Choose Add account in Outlook (in the new Outlook, under Settings → Accounts). Enter the whole email address.
Step 2: Let Outlook find the servers
Tap Connect. Outlook finds the servers for your address itself (automatic setup). Enter the password when asked, and you are done.
Step 3: Does Outlook ask for servers?
Choose IMAP (possibly via Advanced options or Configure manually). Incoming:
mail.sitewig.com, port993, encryption SSL/TLS. Outgoing:mail.sitewig.com, port465, encryption SSL/TLS. Enter the password and tap Connect.
Apple Mail on Mac
Step 1: Add an account
Open Mail, choose Mail → Add Account, select Other Mail Account and click Continue.
Step 2: Enter your name, address and password
Click Sign In. The Mac cannot find the servers itself, so more fields appear.
Step 3: Fill in the servers
Choose IMAP and enter
mail.sitewig.comas both the incoming and outgoing server. The username is the whole address. Click Sign In again.
Calendar and contacts (CalDAV and CardDAV)
With the Essential and Unlimited email plans you can also sync your calendar and contacts between your phone and computer.
CalDAV and CardDAV
- Server
dav.sitewig.com- Port
443- Security
- SSL
- Username
- The whole email address
- Password
- The mailbox password
On iPhone you add them under Mail Accounts → Add Account → Other → Add CalDAV Account (and Add CardDAV Account). In other programs it is typically called network calendar or CalDAV.
Test that it works
- Send an email from the new account to your own address.
- Check that it arrives in the inbox and that it is in Sent both in the program and in Webmail.
Frequently asked questions
Can I download a profile or use automatic setup?
Not yet. The settings have to be entered manually as described above.
The program says the server's certificate can't be verified. What do I do?
Check that the server name is exactly mail.sitewig.com – not your own domain, and not with www. in front.
Can I use the same address on several devices?
Yes. With IMAP you can have the address on as many devices as you like, and they all show the same inbox.