Changing name servers is the moment when your website and your email start running via Sitewig. That is why it is the only step that needs to be timed. Step 5 Switch name servers in the moving guide helps you with a checklist, so that you do not switch too early.
Sitewig's name servers
- Name server 1
ns1.sitewig.com- Name server 2
ns2.sitewig.com
The checklist before the switch
At the top of step 5 is Checklist before switching. Items with an empty circle must be ready. Items with a warning do not block you, but you should take a look at them.
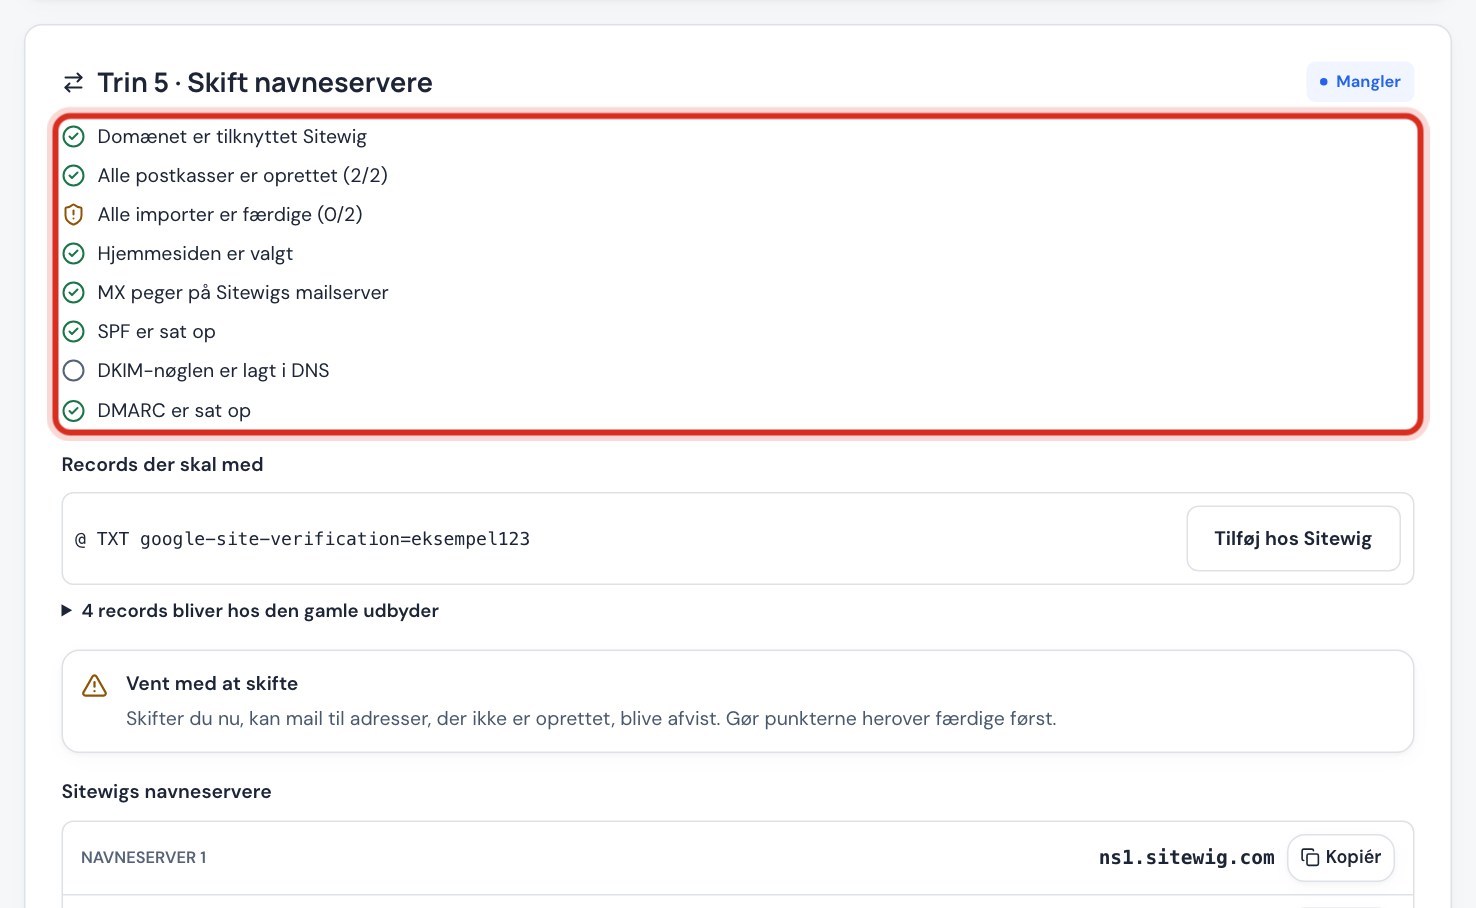
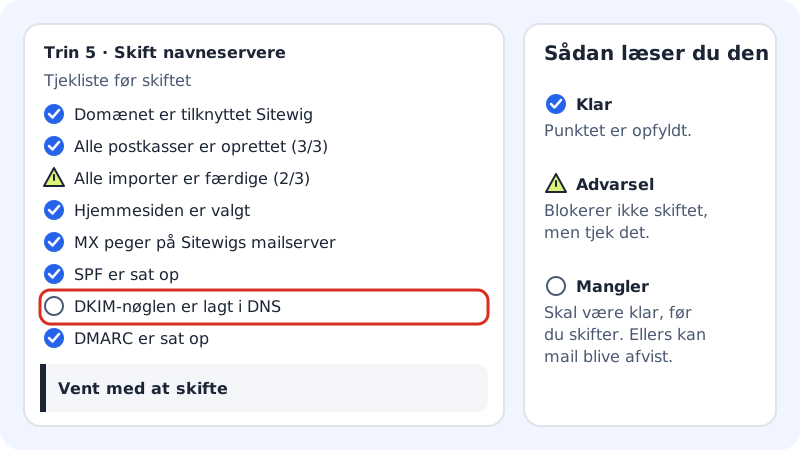
- Must be ready: The domain is attached to Sitewig · All mailboxes are created · MX points to Sitewig's mail server · SPF is set up · The DKIM key is in DNS · DMARC is set up.
- Warnings: All imports are finished · The website is chosen.
If an item is missing, the guide shows Wait before switching. If you switch anyway, email to addresses that have not been created yet may be rejected.
Change the name servers
Step 1: Add the records to bring along
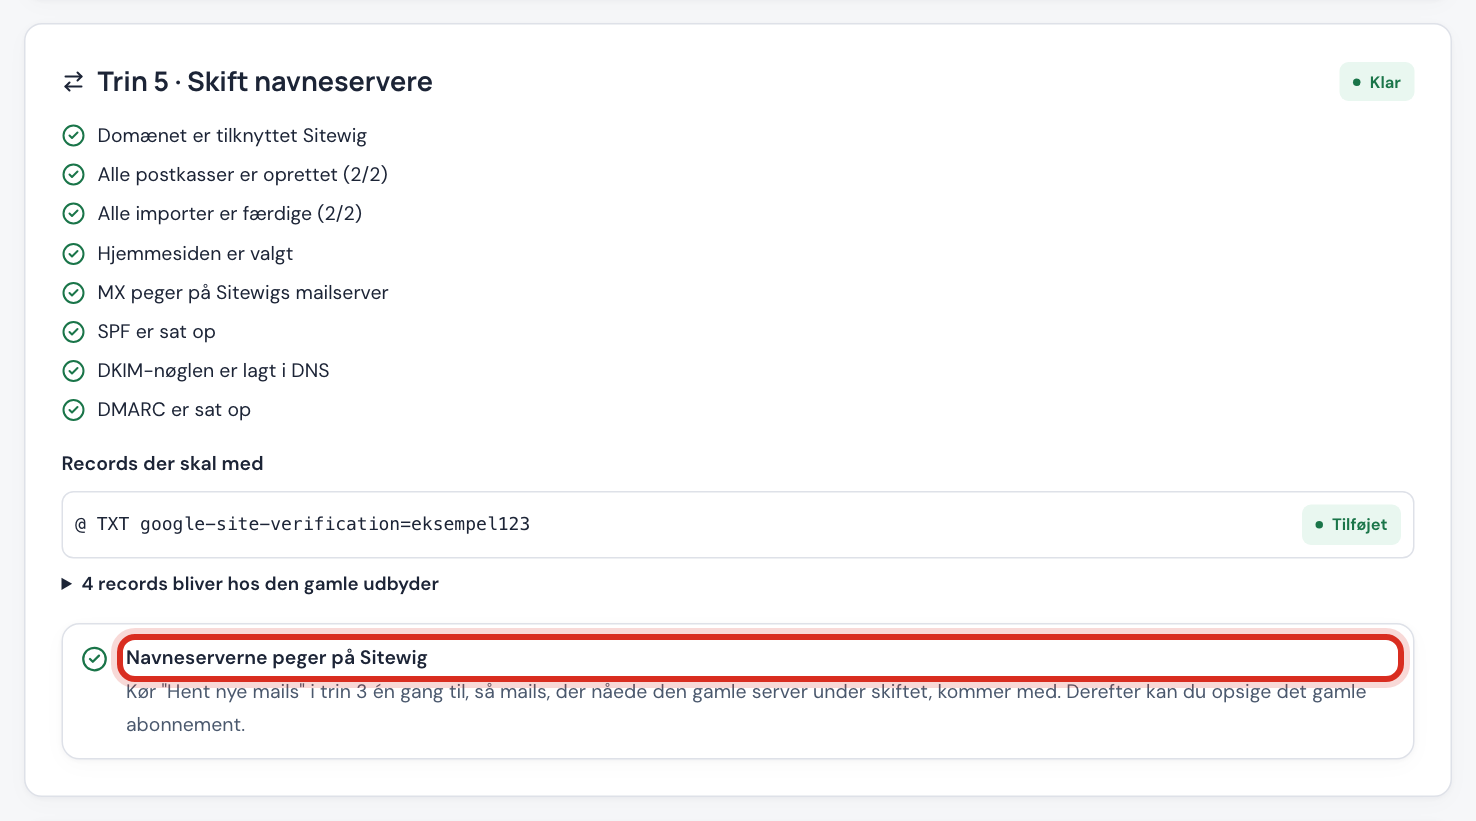
Under Records to bring along, the guide shows records from the old DNS that you made yourself, for example a verification from Google or a subdomain. Tap Add at Sitewig next to each one. Afterwards it says Added.
Step 2: Skip the old email records
Under … records stay at the old provider are the old provider's MX, SPF, DKIM and DMARC records. They are replaced by Sitewig's own – do not create them again. At one.com, for example, this applies to the DKIM keys
rsa1._domainkeyandrsa2._domainkey.Step 3: Sign in in the right place
Where you make the change depends on where the domain's DNS and registration are. The guide shows the steps for your particular provider.
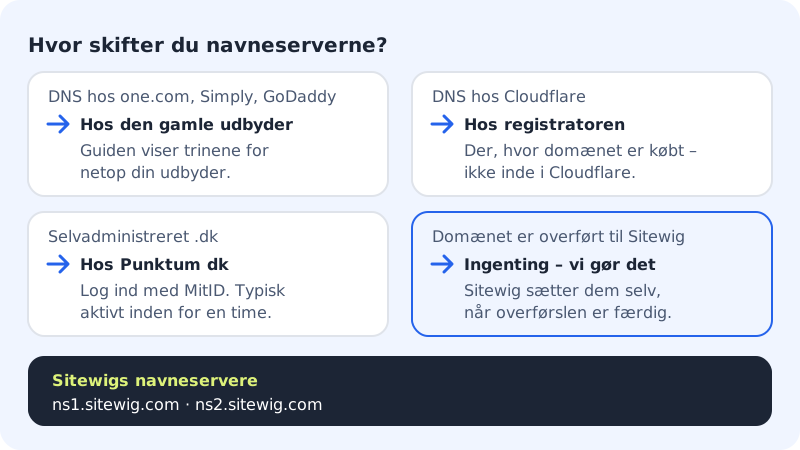
Where do the name servers need to be changed? Step 4: Enter Sitewig's name servers
Choose to use your own name servers, delete the old ones, and enter
ns1.sitewig.comandns2.sitewig.com. Save.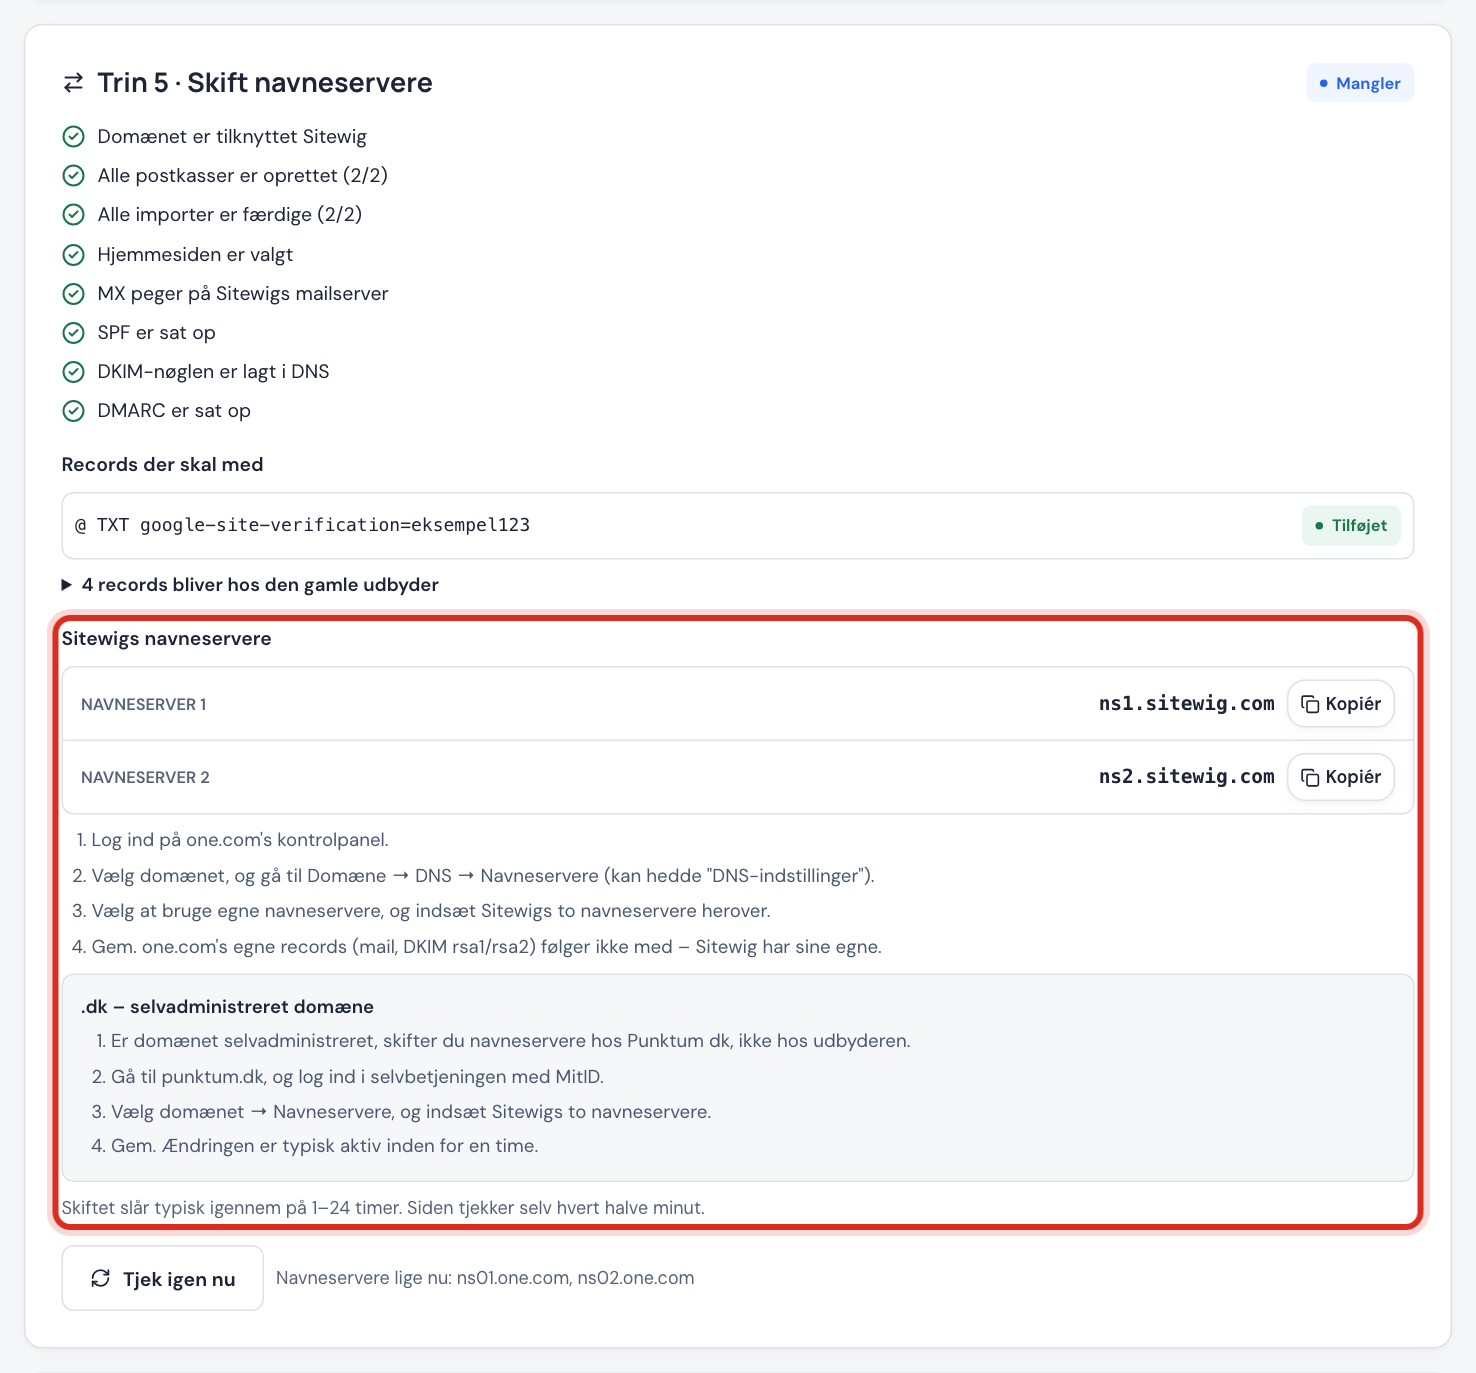
Step 5: Wait for the change to take effect
The change typically takes effect within 1–24 hours. The guide checks by itself every 30 seconds, or you can tap Check again now. Beneath the button it says which name servers the domain has right now.
Step 6: Fetch the last emails
When the guide shows The name servers point to Sitewig, tap Fetch new email in step 3 one more time. That brings along the emails that reached the old server during the switch. Then set up your devices in step 6.
With each provider
Menus at other providers can change, so the names below are only a guide.
Where do you find the name servers?
- one.com
- Choose the domain → DNS → Name servers (may be called DNS settings), and choose your own name servers
- Simply.com
- Choose the domain → Name servers (DNS) → switch to your own name servers
- GoDaddy
- My Products → Domains → choose the domain → DNS → Nameservers → Change
- Cloudflare
- Do not change in Cloudflare – change where the domain is registered
- Self-managed .dk
- At Punktum dk with MitID → the domain → Name servers
- Transferred to Sitewig
- Nothing – Sitewig sets the name servers itself
Frequently asked questions
Why does it take up to 24 hours?
The internet's DNS servers remember the old answers for a while (TTL). Some visitors therefore see the new setup before others. See TTL and waiting time.
Will any email be lost in the changeover?
No, as long as the old mailbox exists. Emails that land with the old provider during the changeover are fetched with Fetch new email. That is why you should wait before cancelling the old subscription.
I have transferred the domain: do I need to do anything?
No. When the transfer has completed, Sitewig sets the name servers itself. Just create your mailboxes beforehand.
When can I cancel with the old provider?
When the name servers point to Sitewig, you have run Fetch new email, and your website works. If you have chosen to keep the old website, however, the web hosting there must keep running.