If your website uses cookies or other tracking for statistics or marketing, the visitor must say yes first. Sitewig's website builder has a cookie banner that comes with every plan and holds back tracking until the visitor has made a choice.
When do you need a banner?
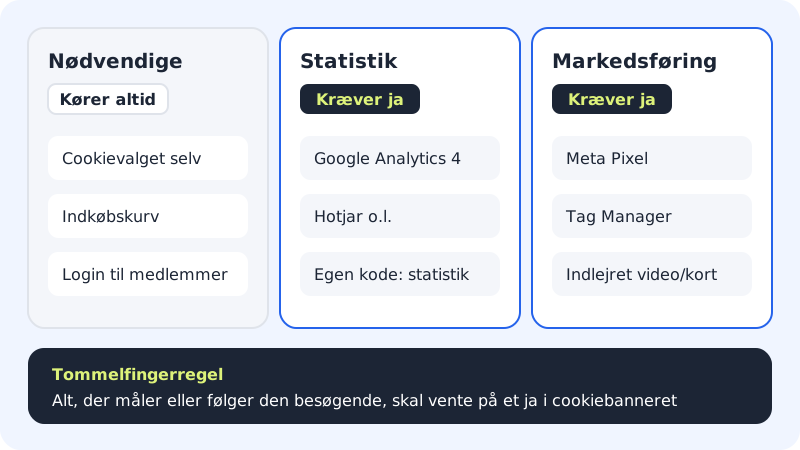
- Necessary cookies, which the site can't work without – for example the cookie choice itself or a shopping basket – don't require consent.
- Statistics, for example Google Analytics, require consent.
- Marketing (for example Meta Pixel, ads and embedded videos from other services) requires consent.
The banner is shown automatically when your site uses tracking. If the site only uses necessary things, it isn't shown.
What the banner looks like
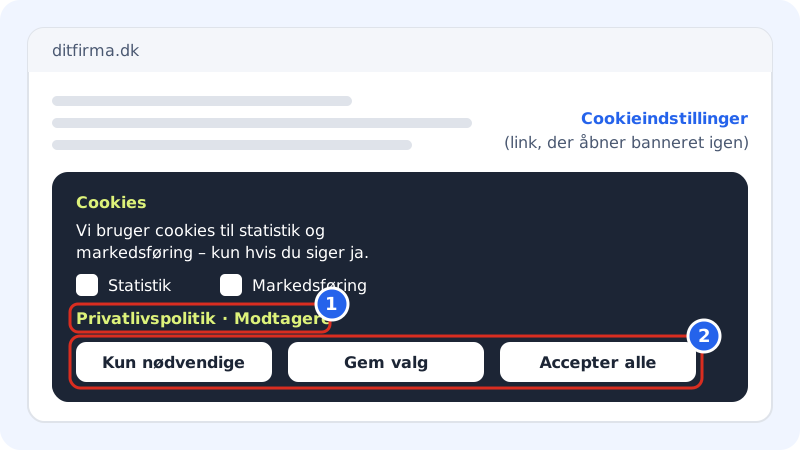
The banner has the title Cookies, a short text, the choices Statistics and Marketing, and three buttons: Only necessary, Save choices and Accept all. It also shows who receives data (for example Google and Meta) and that data may be transferred to the USA. The Cookie settings link on the page reopens the banner so the visitor can change their choice.
Set up the banner
Step 1: Open Cookie banner
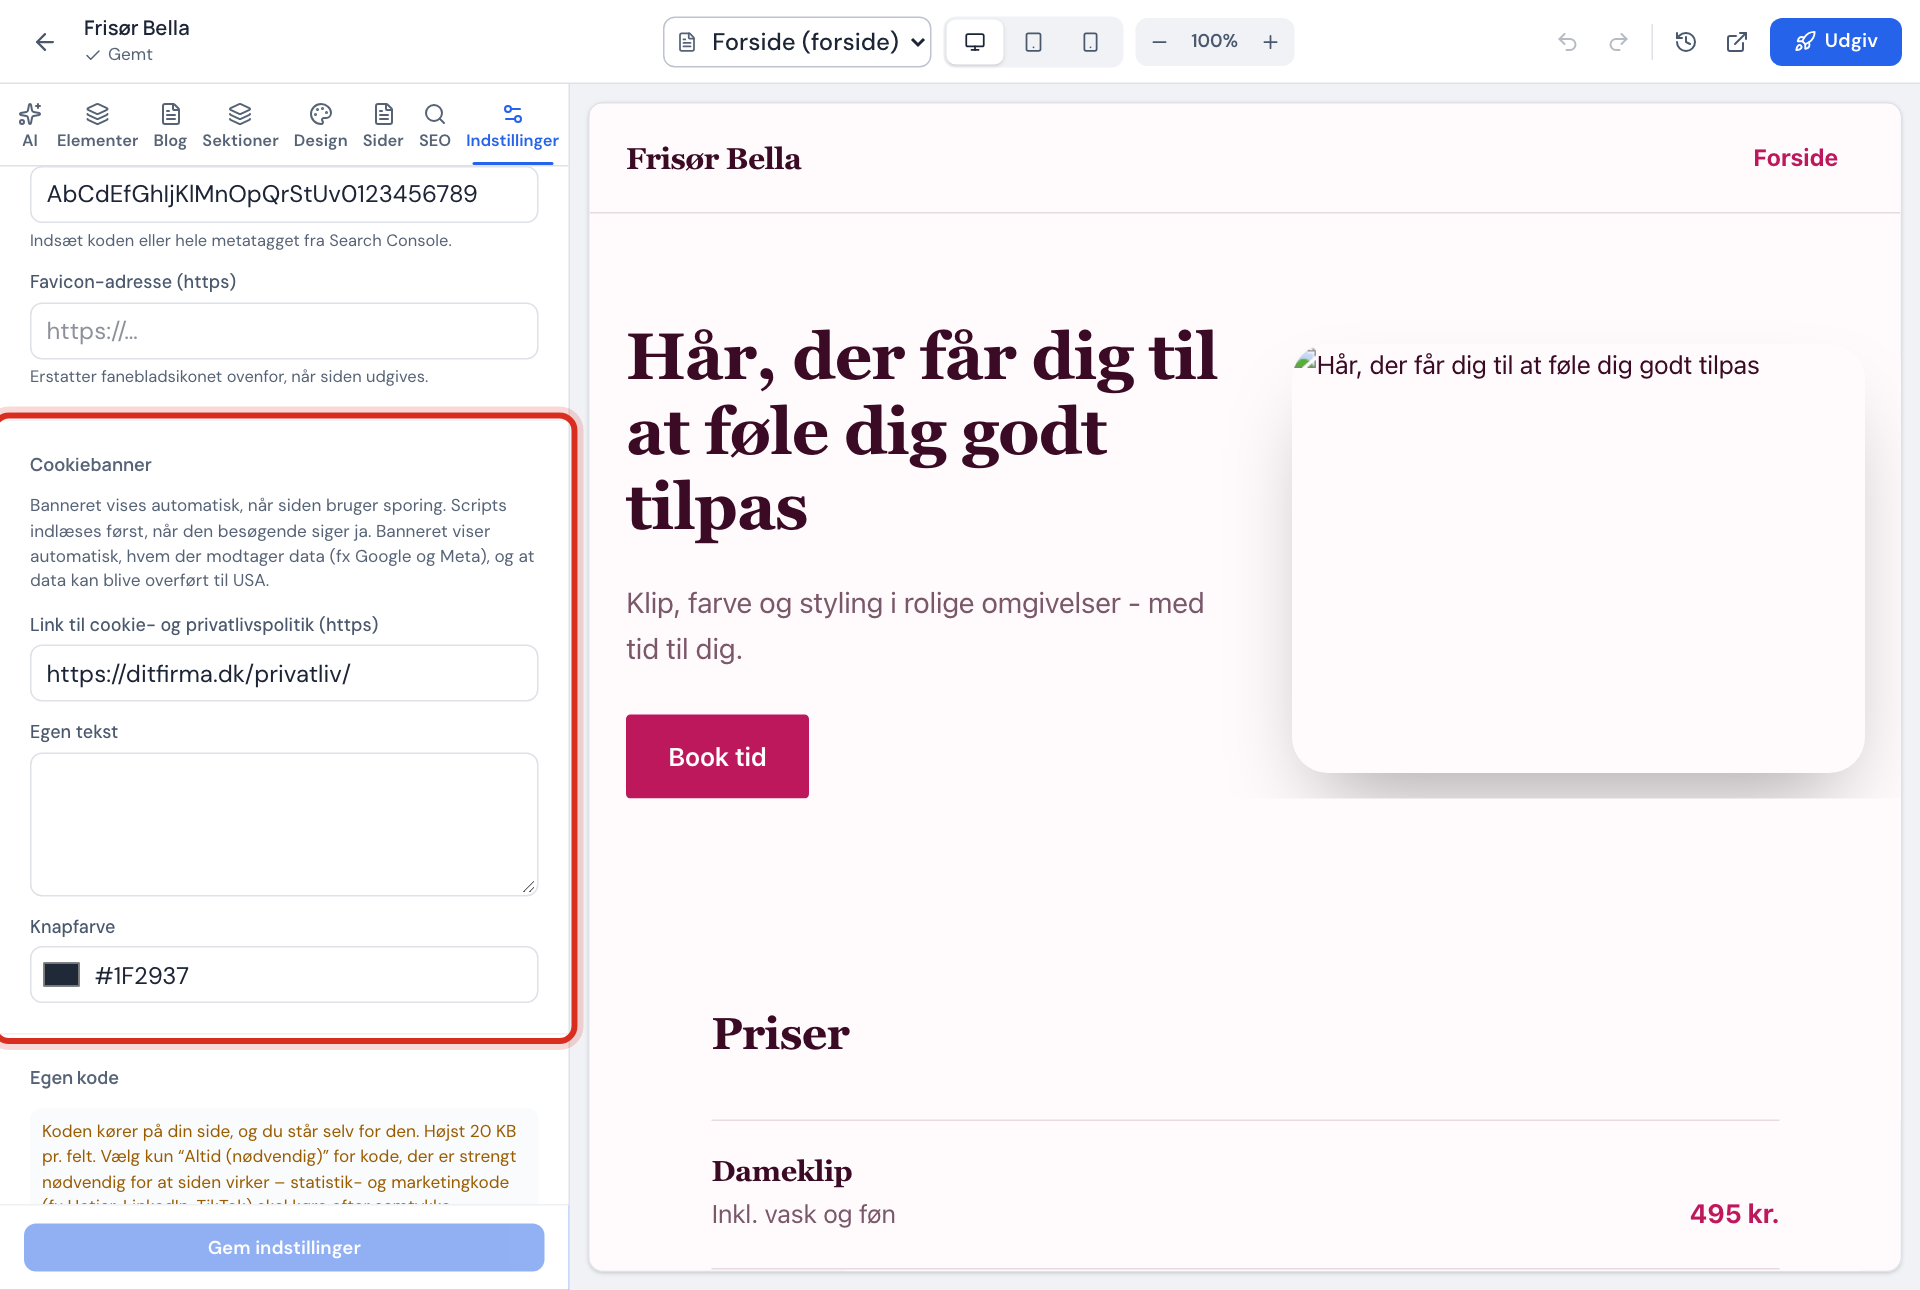
In the editor, go to the Settings tab and find the Cookie banner section under Website settings.
Step 2: Add a link to your policy
Fill in Link to cookie and privacy policy (https). The field is required when the site uses tracking or custom code.
Step 3: Customise text and colour (Pro and above)
With Pro or higher you can write your own Custom text (maximum 600 characters) and choose the Button colour. The list of recipients and the notice about the USA always stay below your text.
Step 4: Save and publish
Press Save settings, and publish the website.
Step 5: Test in a private window
Open the website in a private browser window. The banner should appear, and no tracking may be loaded until you've made a choice.
Cookie scan and cookie policy
The Cookies and consent section under the Settings tab scans the website every time you publish it and shows which services it loads content from.
- Behind consent means the service waits for a yes. That's good.
- Loads without consent is a warning. If it says, for example, that a service loads before the visitor has said yes, put it behind the cookie banner or remove it.
- Data to the USA shows services that send data outside the EU.
- Unknown services must be described in your privacy policy or removed.
Based on the scan, Sitewig can create a cookie policy. Press Create cookie policy page, and link to the page from the footer or the cookie banner. When the scan changes, press Update cookie policy page.
Consent log (Business and Max)
With Business or Max, Sitewig stores every choice made in the cookie banner so you can document the consent. Only a random consent ID, the choice, the banner version, language and time are stored – no IP address. The records are deleted automatically after the retention period shown.
- Search for a Consent ID if a visitor asks about their choice.
- Press Download as CSV to save the log.
- Press Delete records when a visitor asks for deletion.
WordPress and other sites on the web hosting
The cookie banner above applies to websites from the website builder. For a WordPress site, use a cookie plugin in WordPress. The Security → Cookie consent menu in the control panel is being extended to cover web hosting sites.
Frequently asked questions
Do I need a banner if I only use Sitewig's statistics?
Sitewig's built-in statistics don't use cookies, so they don't require a banner in themselves. Mention them in your privacy policy.
Can I remove the Only necessary button?
No. Saying no must be as easy as saying yes, so the three buttons always have the same style.
A YouTube video doesn't appear until you say yes?
That's intended. Embedded videos and maps from other services set cookies, so they're only loaded after consent.