If you have built your website in Lovable, your domain at Sitewig can show it. The domain, your DNS records and your email stay at Sitewig – only the website is hosted at Lovable. You need a Sitewig account with the domain and access to your project in Lovable.
How it fits together
When you choose Lovable as the target, Sitewig updates two A records so that both yourcompany.com and www.yourcompany.com point to Lovable's server. At the same time, Lovable asks you for a TXT record that proves you own the domain. You save that at Sitewig too.
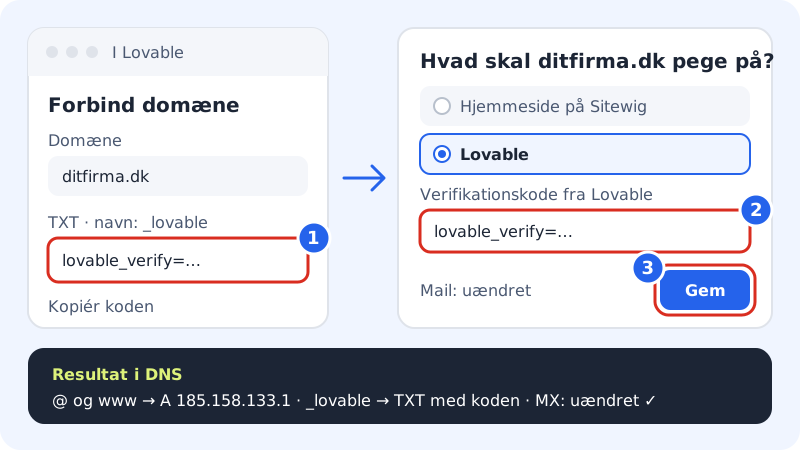
Records Sitewig creates for you
- Name @ (the domain itself)
- A record
185.158.133.1 - Name www
- A record
185.158.133.1 - Name _lovable
- TXT record with the code from Lovable, e.g.
lovable_verify=… - Mail (MX)
- Unchanged – your email works as before
Point the domain to Lovable
Step 1: Start in Lovable
Open your project in Lovable, go to the project's domain settings and choose to connect your own domain. Enter your domain, e.g.
yourcompany.com. Lovable now shows a TXT value for the name_lovable. Copy the value – it usually starts withlovable_verify=.Step 2: Open the domain at Sitewig
Sign in to the control panel and choose Domains → My domains. Click the domain that should show the Lovable website.
Step 3: Choose Lovable as the target
Tap Change target. In the window What should yourcompany.com point to? choose Lovable under What should the domain show?. Leave the choice under Where should email be delivered? as it is.
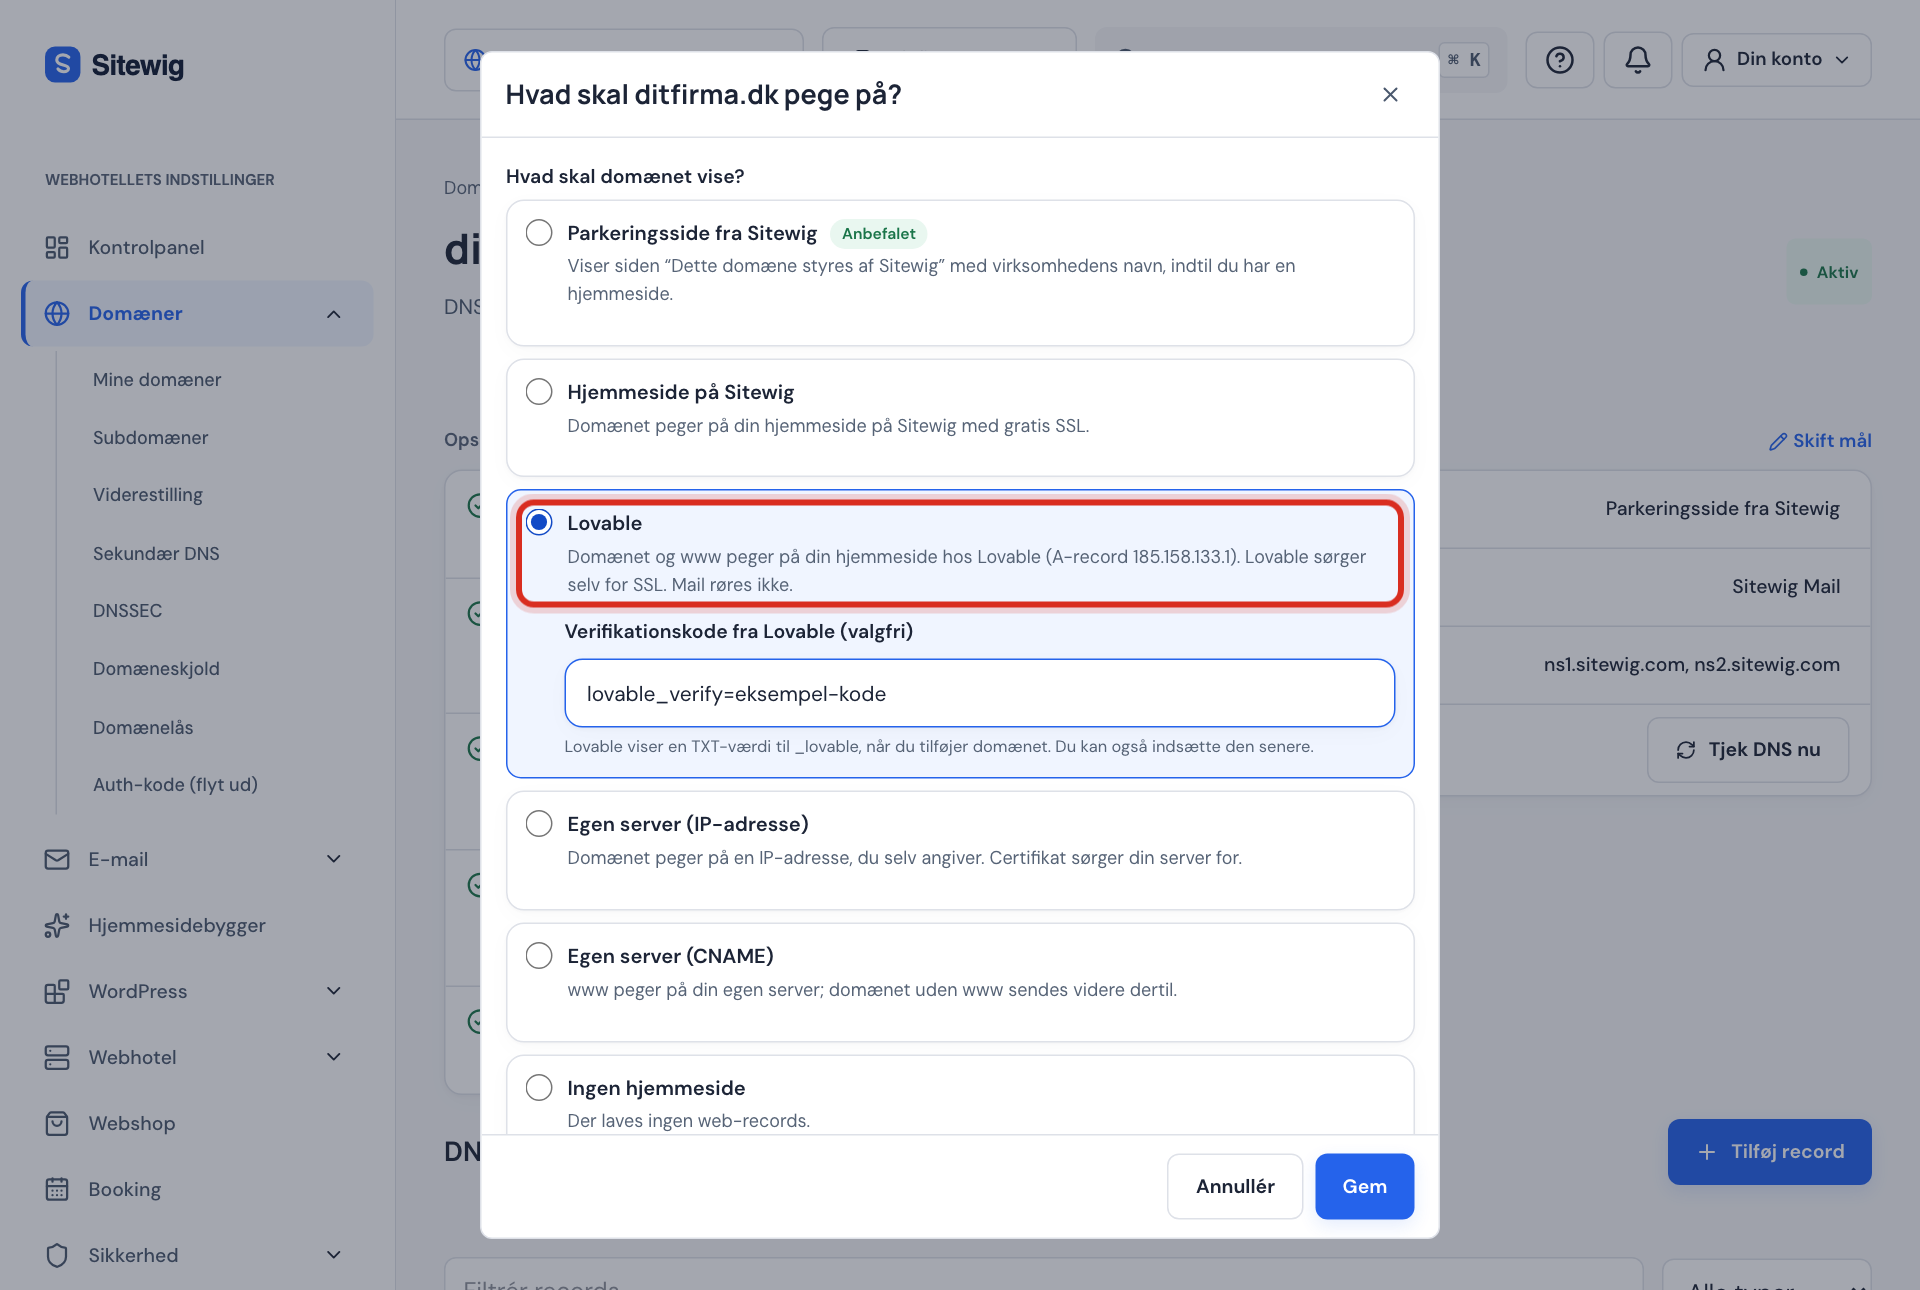
Change target: choose Lovable and paste the code from Lovable Step 4: Paste the verification code
Paste the code from Lovable into the field Verification code from Lovable (optional) and tap Save. If you do not have the code yet, you can save without it and add it afterwards.
Step 5: Confirm in Lovable
Go back to Lovable and ask it to check the domain. The change normally reaches the name servers within a few minutes. Lovable issues the SSL certificate itself, so the website runs on
https://.
If you cannot choose Lovable
Lovable as a target is currently being rolled out to all customers. If you do not see Lovable in the list under Change target, you can achieve the same thing manually:
- Tap Change target, choose Own server (IP address), enter
185.158.133.1as the IPv4 address and tap Save. This points the domain itself to Lovable. - Scroll down to the DNS section on the domain page and tap Add record. Create an A record with the name
wwwand the value185.158.133.1. - Add another record of the type TXT with the name
_lovableand the code from Lovable as the value.
Switch back to a website at Sitewig
Tap Change target and choose, for example, Website on Sitewig or Parking page from Sitewig. The A records switch immediately. Your TXT record for Lovable stays in place, so you can easily switch back again – you can delete it in the DNS section if you do not need it.
Frequently asked questions
Do I need to move the domain to Lovable?
No. The domain stays registered and renewed at Sitewig. You simply point it to Lovable's server.
Why does Lovable say the domain is not verified?
Check that the TXT record is named _lovable and that the value is exactly what Lovable shows – with no extra spaces. Sitewig removes quotation marks around the code by itself. Wait a few minutes and try again.
Does my email still work?
Yes. Sitewig only changes records for the website (@ and www). The MX and SPF records for your email stay where they are.