In the DNS section on the domain page you see all the records for your domain and can add your own. Changes reach Sitewig's name servers within a few minutes.
Add a record
Step 1: Open the domain
Choose Domains → My domains and click the domain. Scroll down to the DNS section.

The DNS section on the domain page Step 2: Tap Add record
A panel opens on the right.
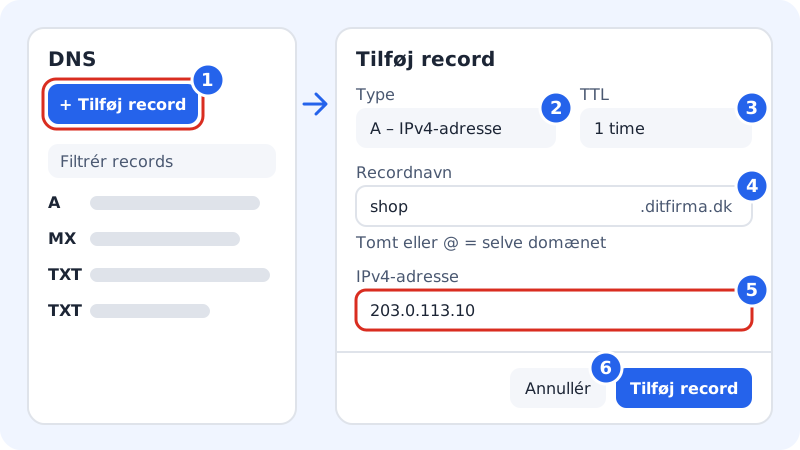
The fields in the Add record panel Step 3: Choose Type and TTL
Choose the record type, e.g. A – IPv4 address, CNAME – alias, MX – mail server or TXT – text. The fields below change according to the type. Leave TTL at 1 hour unless you have a reason to change it – see TTL and waiting time.
Step 4: Enter the Record name
Enter only the part that comes before the domain, e.g.
www,shopor_dmarc. Leave the field empty or enter@for the domain itself.*is a wildcard that applies to all names without their own records.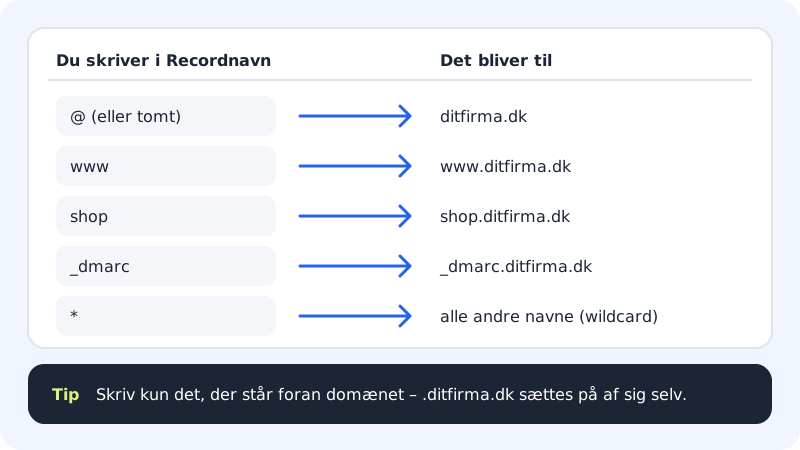
Record name: enter only what comes before .yourcompany.com Step 5: Enter the value
The field has a different name depending on the type – e.g. IPv4 address for A, Points to for CNAME, Mail server and Priority for MX and Text for TXT.
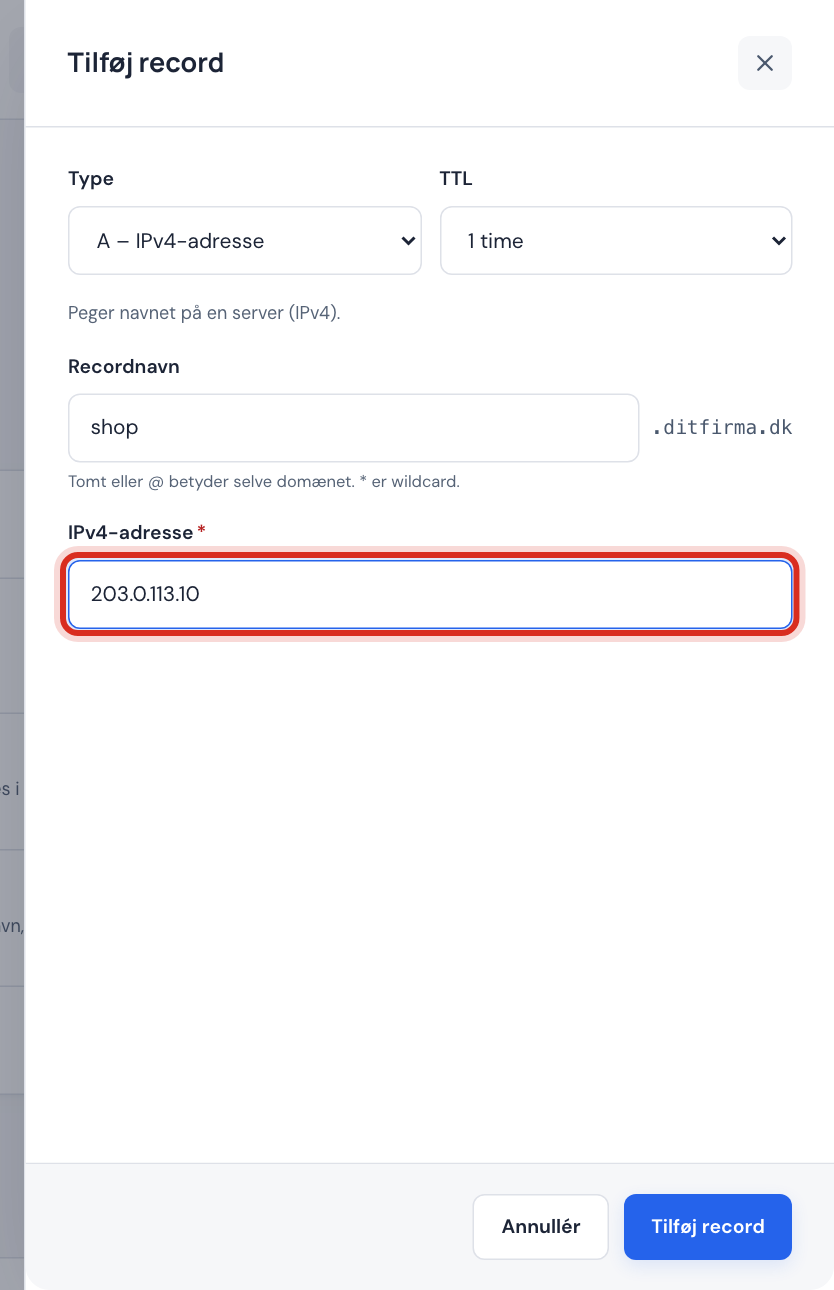
Example: A record for shop.yourcompany.com Step 6: Save
Tap Add record. You see the message The DNS record has been saved, and the change reaches the name servers within a few minutes.
Edit or delete a record
- Find the record in the table. Use Filter records to search by name or value, and All types to show one type at a time.
- Tap the … menu (More actions) in the Manage column.
- Choose Edit, change the fields and tap Save changes – or choose Delete and confirm in the Delete DNS record? window.
Supported record types
| Type | Used for | Guide |
|---|---|---|
| A / AAAA | Points a name to an IPv4 or IPv6 address | A and AAAA records |
| CNAME | Makes a name an alias | CNAME |
| MX | Where email is delivered | MX records |
| TXT | SPF, DKIM, DMARC and verification | TXT records |
| SRV, CAA, NS | Services, SSL issuers and delegation of subdomains | Advanced records |
| DS, TLSA, SSHFP | DNSSEC, DANE and SSH – for technical users | Advanced records |
Error messages you may see
| Message | What you do |
|---|---|
| Conflict with existing records | The name already has a CNAME, or you are trying to create a CNAME on a name that has other records. See CNAME. |
| Enter a valid IPv4 address, e.g. 203.0.113.10. | Enter an IP address with four numbers separated by full stops. |
| Only a-z, 0-9, hyphen and underscore … | The record name contains a character that cannot be used. Danish characters are allowed and are converted automatically. |
| An identical record already exists. | The record already exists – you do not need to create it again. |
| Default setup records are changed by changing target. | Use Change target instead. |
A domain can have up to 300 records.
Frequently asked questions
Why is the Add record button greyed out?
You are not an owner or administrator of the company. Ask an owner to give you the role, or to make the change.
Why does TTL show as 3600 s in the table?
The table shows TTL in seconds. 3600 seconds is 1 hour.
Can I restore a record I have deleted?
No, deleting cannot be undone. Note down the value before you delete, so you can create the record again with Add record.