The online shop always belongs to one of your websites on Sitewig. You create products, shipping and payment in the control panel, and customers buy directly on your website. The shop starts out closed, so you can build it up and test it in peace. Only when everything required by law is in place can you open for sales.
What you need in place
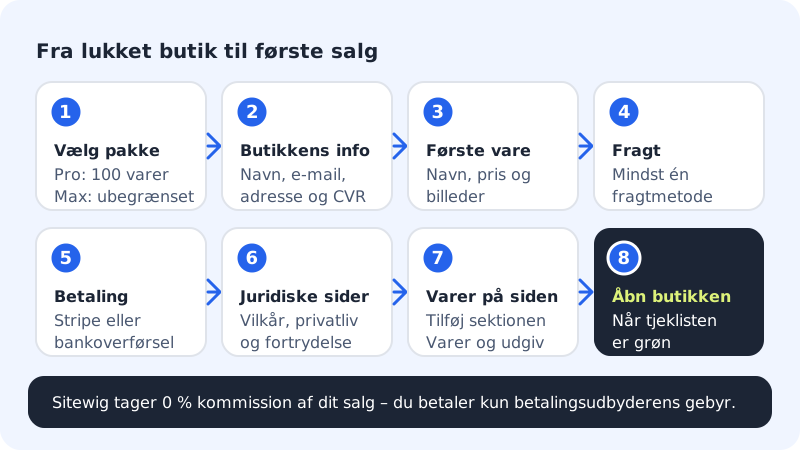
- A plan with an online shop. The online shop is included from Pro (up to 100 products). Max and Business have an unlimited number of products. Free and Starter do not include an online shop.
- A website built in Sitewig's website builder. If you do not have one, the online shop shows the message You don't have a website yet with a button to the website builder.
- Your company details: the shop's name, contact email, address and CVR number. Danish e-commerce law requires that customers can see who they are buying from.
- Three legal pages on your website: terms and conditions, privacy policy and a page for withdrawal.
Set up and open the shop
Step 1: Go to Online shop → Overview
Sign in to the control panel and choose Online shop in the menu. The Overview tab opens. If you have several websites, choose the right one in the Website drop-down at the top – each website has its own shop.
Step 2: Go through the checklist
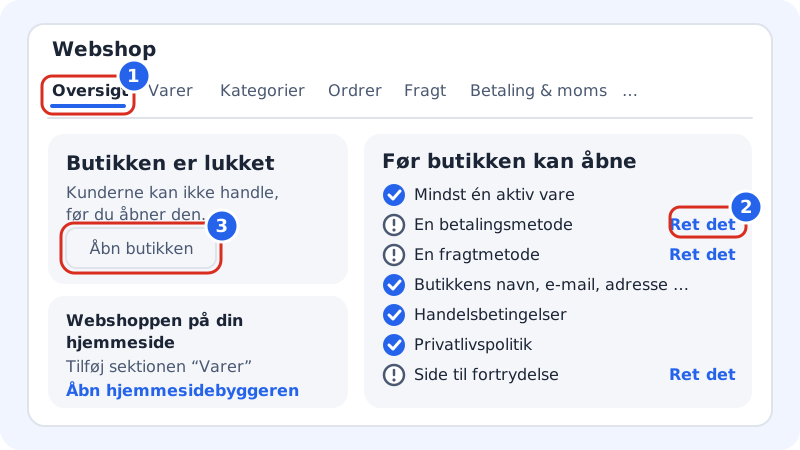
The Before the shop can open card shows seven items. Each item that is missing has the link Fix it, which takes you straight to the right place:
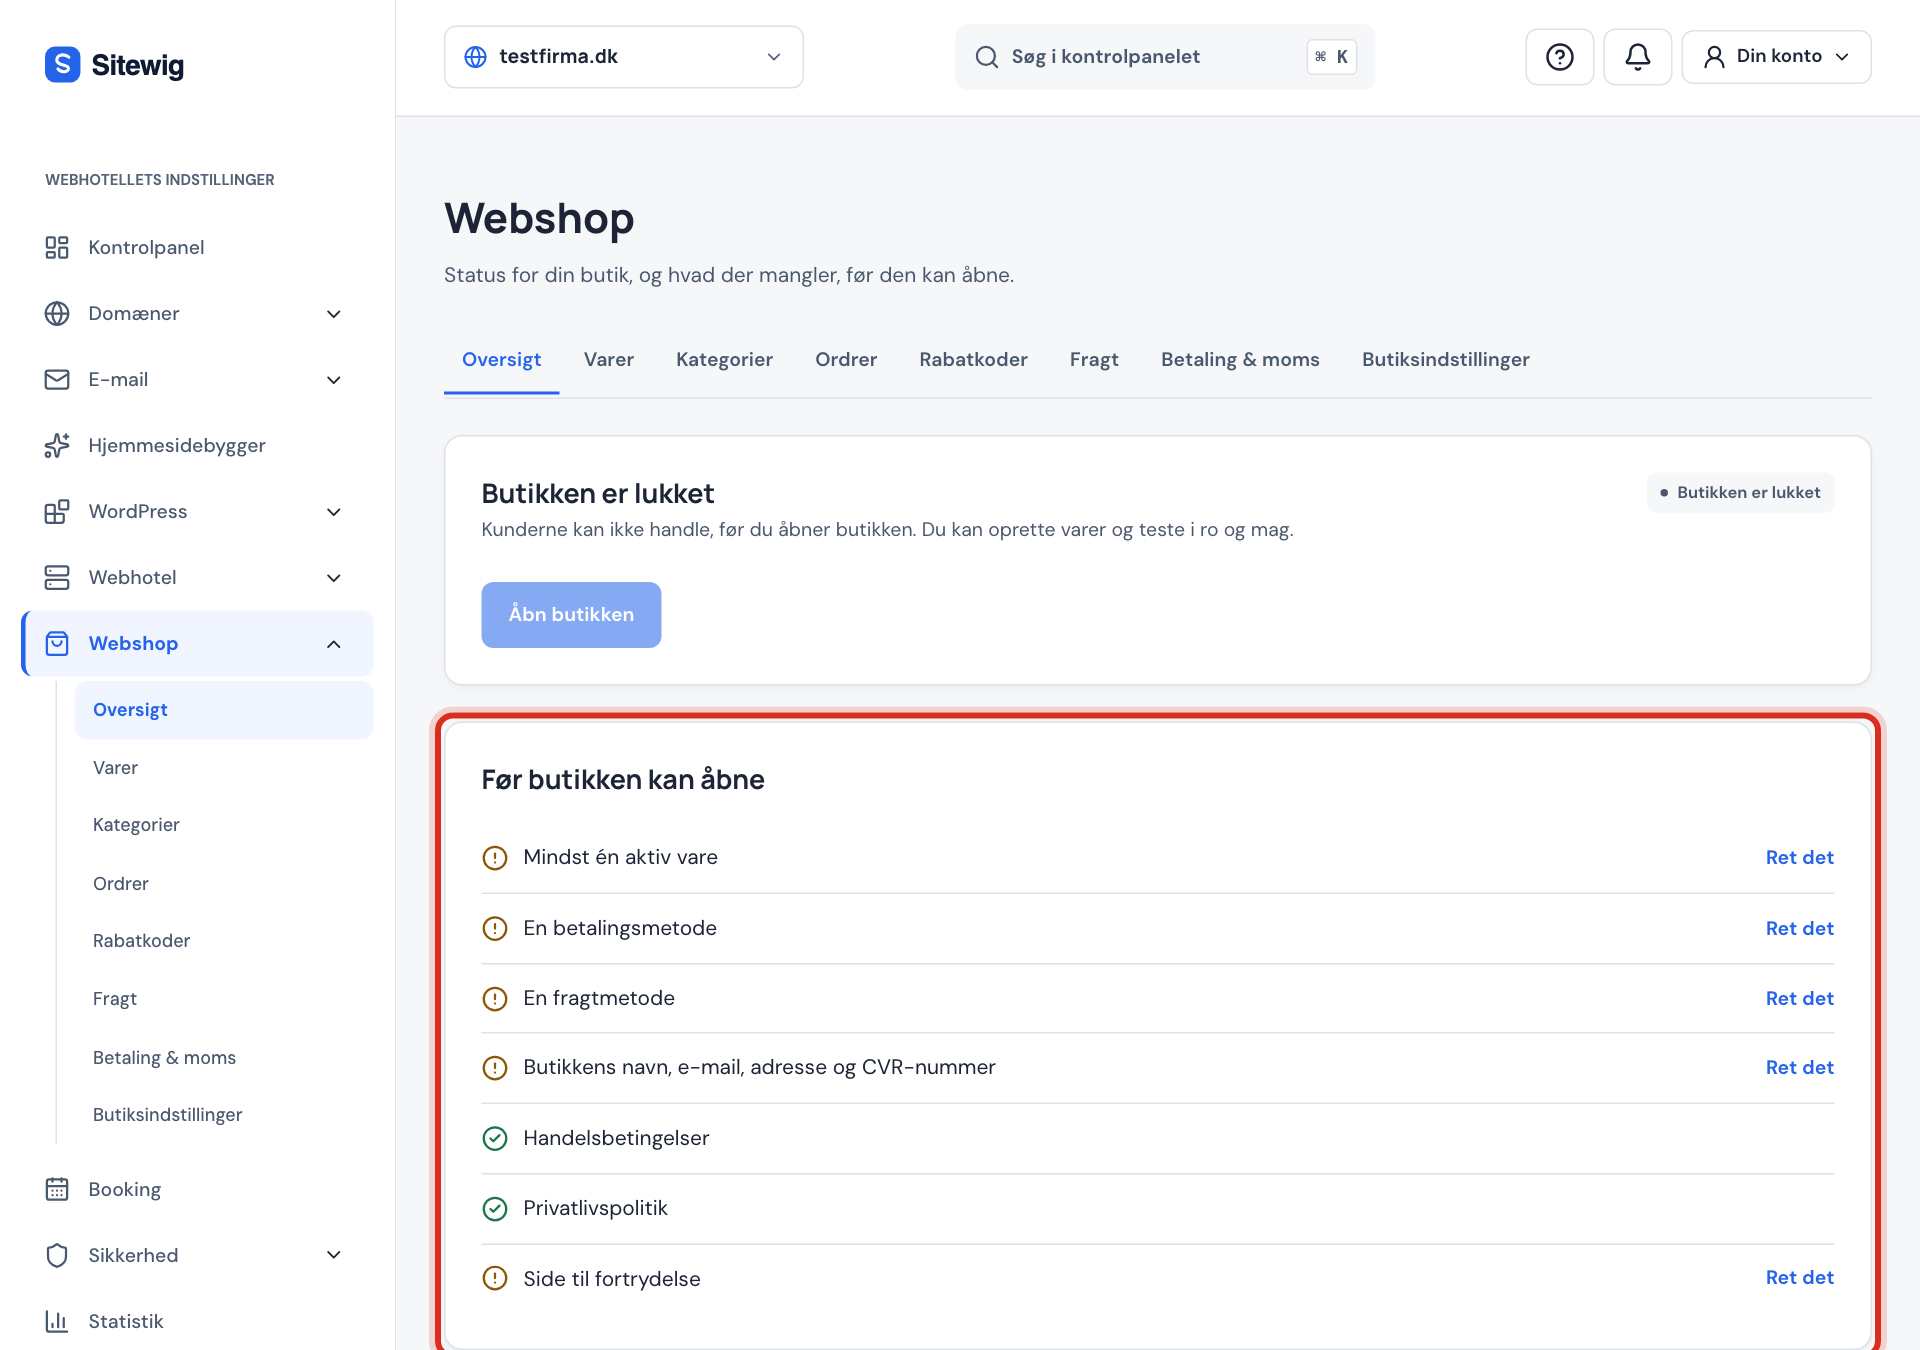
- At least one active product – see Create a product with price, images and previous price.
- A payment method – Stripe or a manual method such as bank transfer. See Accept payment via Stripe.
- A shipping method – see Set up shipping. If you only sell digital products or gift cards, shipping is not needed.
- Shop name, email, address and company number
- Terms and conditions
- Privacy policy
- Withdrawal page
Step 3: Fill in the shop details and legal pages
Go to Shop settings. Under Shop details, fill in Shop name, Contact email, Address and Company/VAT number. If you want order notifications sent to another address, enter it in Email for order notifications.
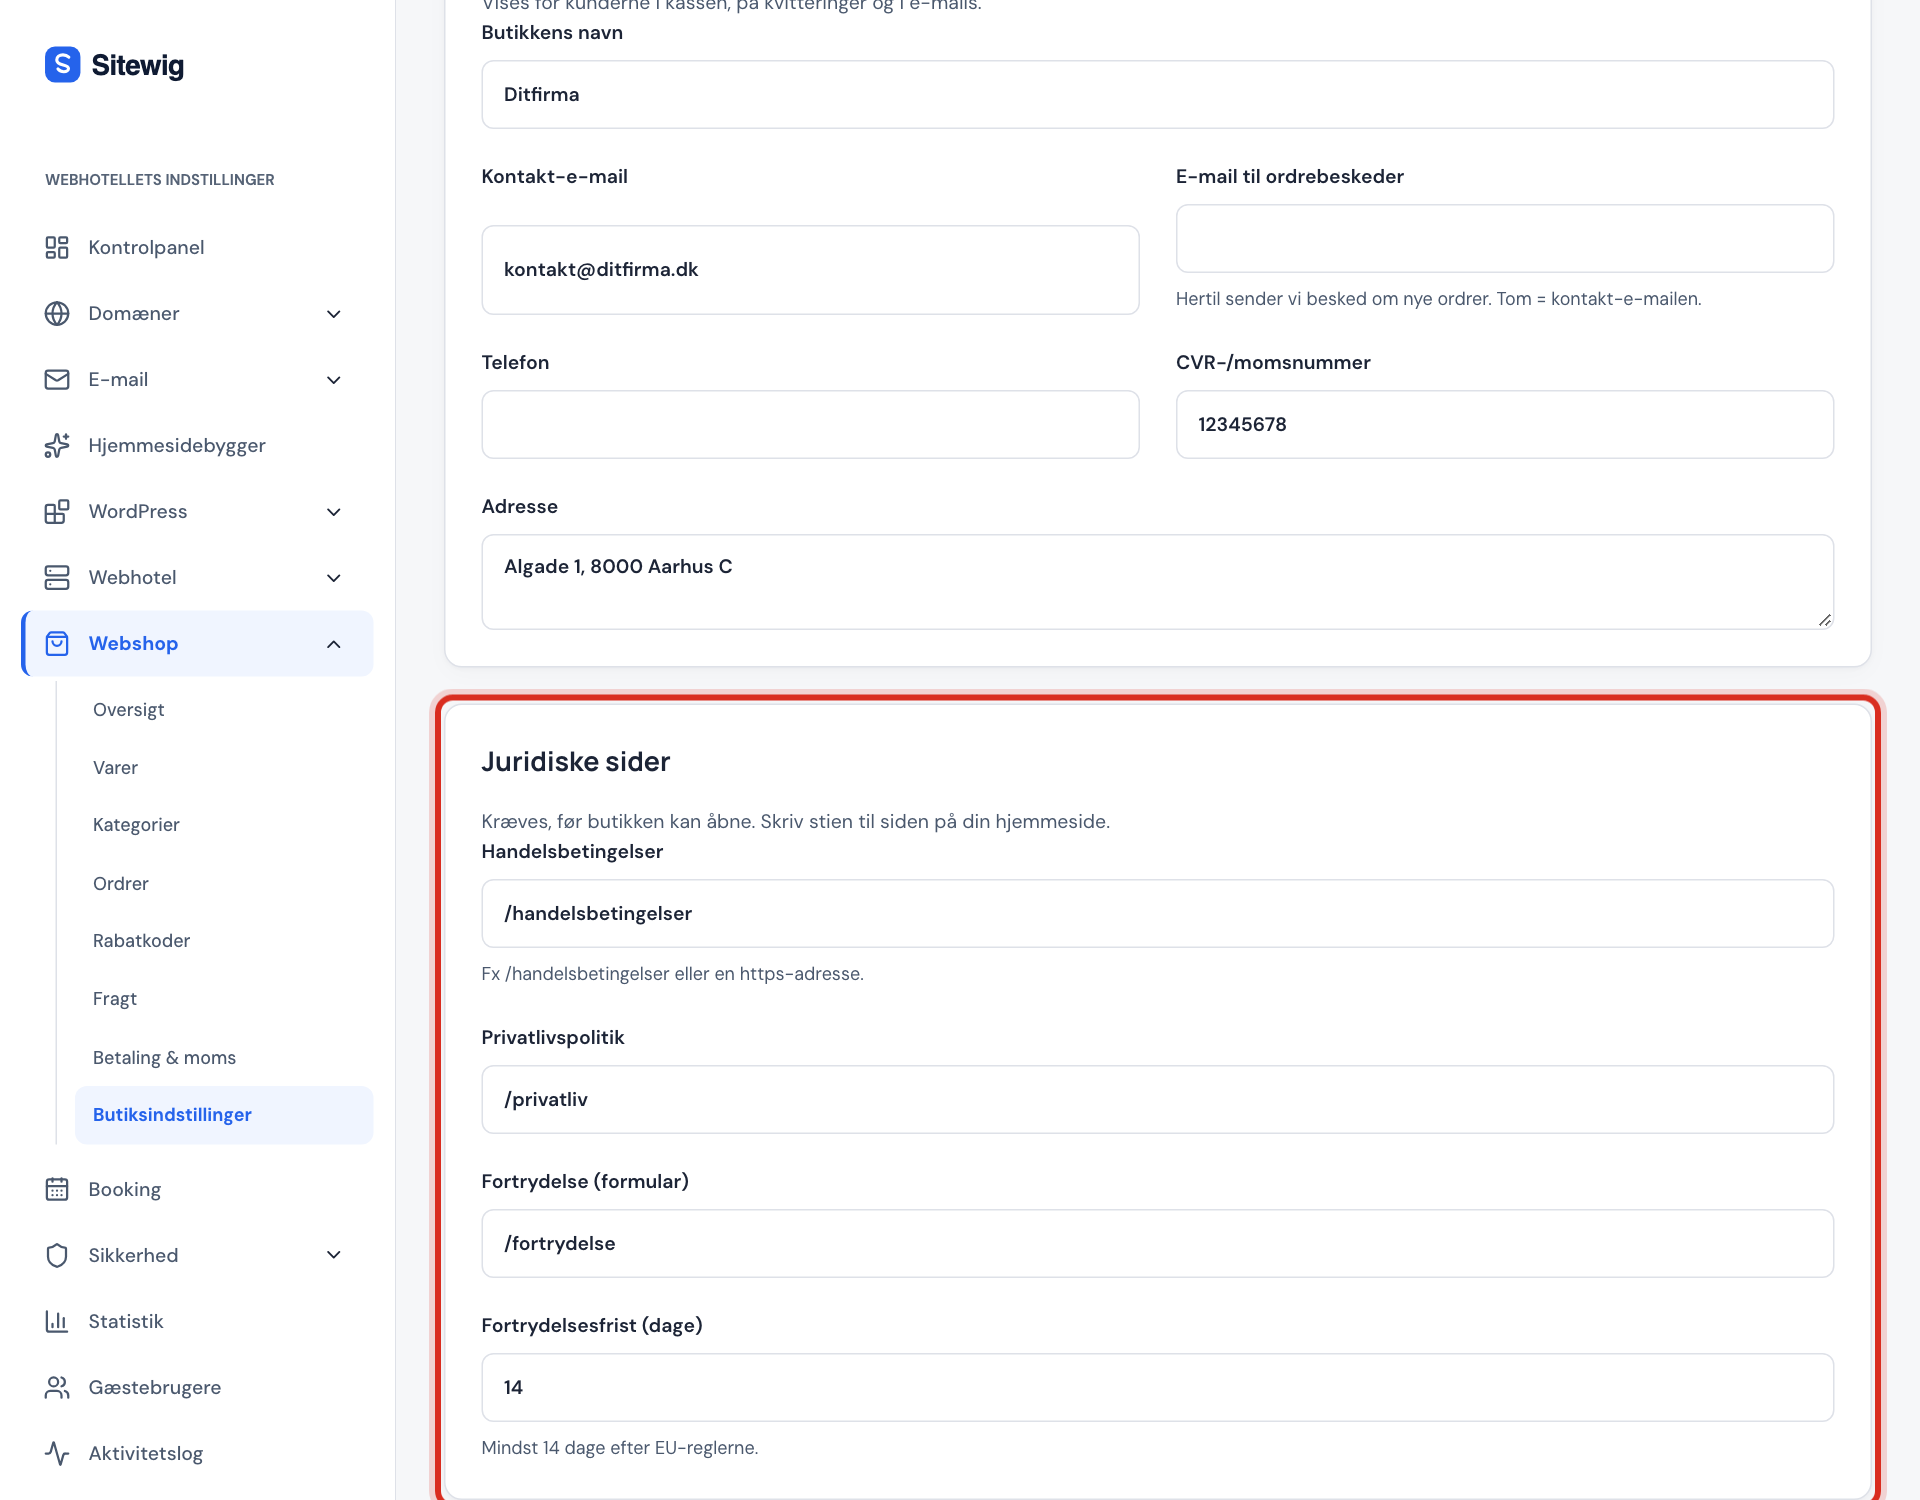
Under Legal pages, enter the path to each page on your website, e.g.
/terms,/privacy-policyand/withdrawal. Click Save.Step 4: Show the products on your website
The The shop on your website card tells you whether customers can see the shop. If it says the online shop is not shown yet, click Open the website builder, add the Products section on the page where the shop should be, and publish the website.
Step 5: Open the shop
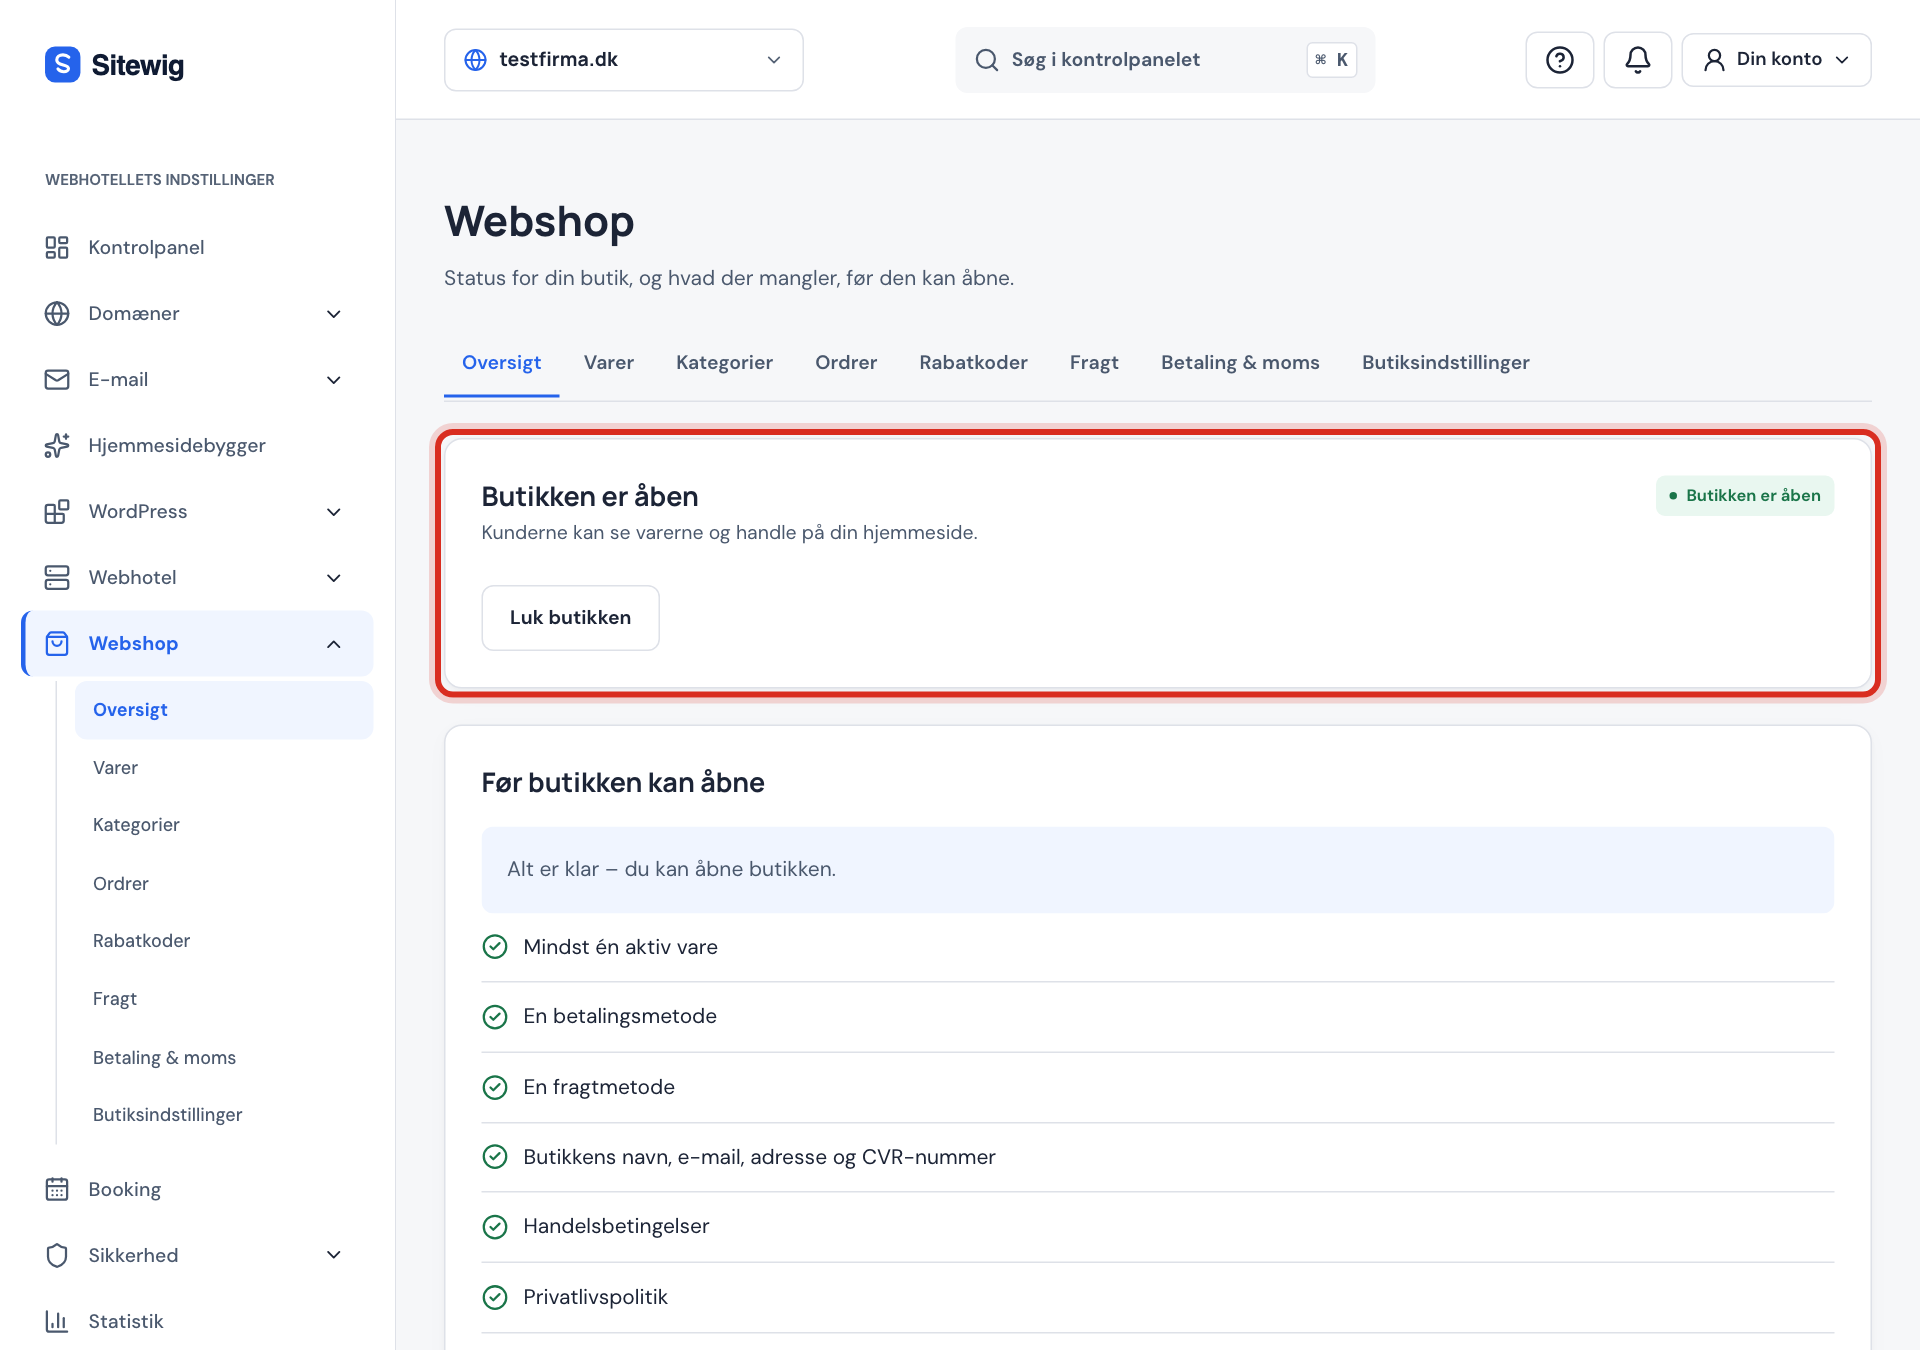
When all items in the checklist have a tick, it says Everything is ready – you can open the shop. Click Open the shop. The status changes to The shop is open, and customers can now add products to the basket and pay.
The tabs in the online shop
| Tab | What you do here |
|---|---|
| Overview | Open and close the shop, see the checklist and the latest orders |
| Products | Create products, variants and stock, or import from CSV |
| Categories | Divide the products so customers can find them easily |
| Orders | Ship, refund and export orders |
| Discounts | Create discount codes and automatic offers |
| Shipping | Set up shipping prices, free shipping and collection |
| Payments & VAT | Connect Stripe, turn on manual payments and set up VAT |
| Shop settings | Fill in the shop details, legal pages and right of withdrawal |
Frequently asked questions
How many products can I have in the online shop?
With Pro you can have up to 100 products per website. Max and Business have an unlimited number of products.
Does Sitewig take a percentage of my sales?
No. Sitewig takes 0% commission on all plans. You only pay for your plan and Stripe's fee on the payments that go through Stripe.
Can I close the shop temporarily, e.g. during the holidays?
Yes. Go to Online shop → Overview and click Close the shop. The products stay in place, but customers cannot buy until you click Open the shop again.
Why can I not click Open the shop?
The button is greyed out as long as something is missing in the Before the shop can open checklist. Click Fix it next to the items without a tick, and go back to Overview.
Can I have an online shop on several websites?
Yes. Each website has its own shop with its own products, orders and settings. You switch between them in the Website drop-down at the top of the online shop.