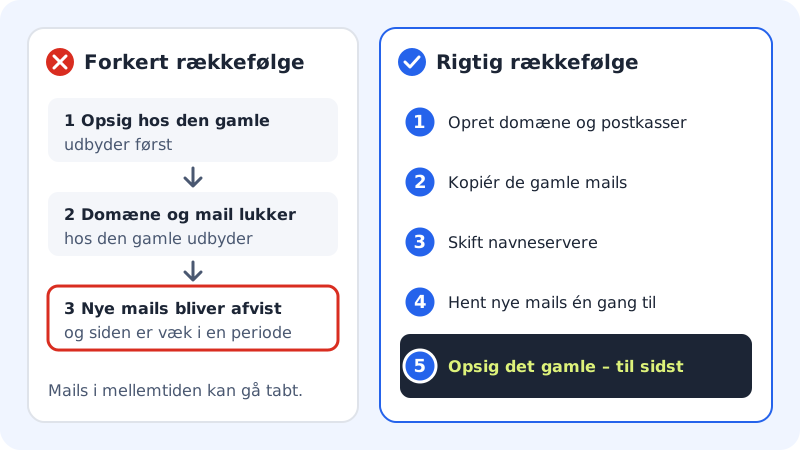
Switching provider is about three things: your domain, your email and your website. If you do things in the right order, neither your customers nor your colleagues notice anything. If you do them in the wrong order, emails may be rejected and the website may be gone for a while.
The golden rule is simple: build everything up at Sitewig first, then change name servers, and only cancel the old subscription at the very end.
The Move here guide
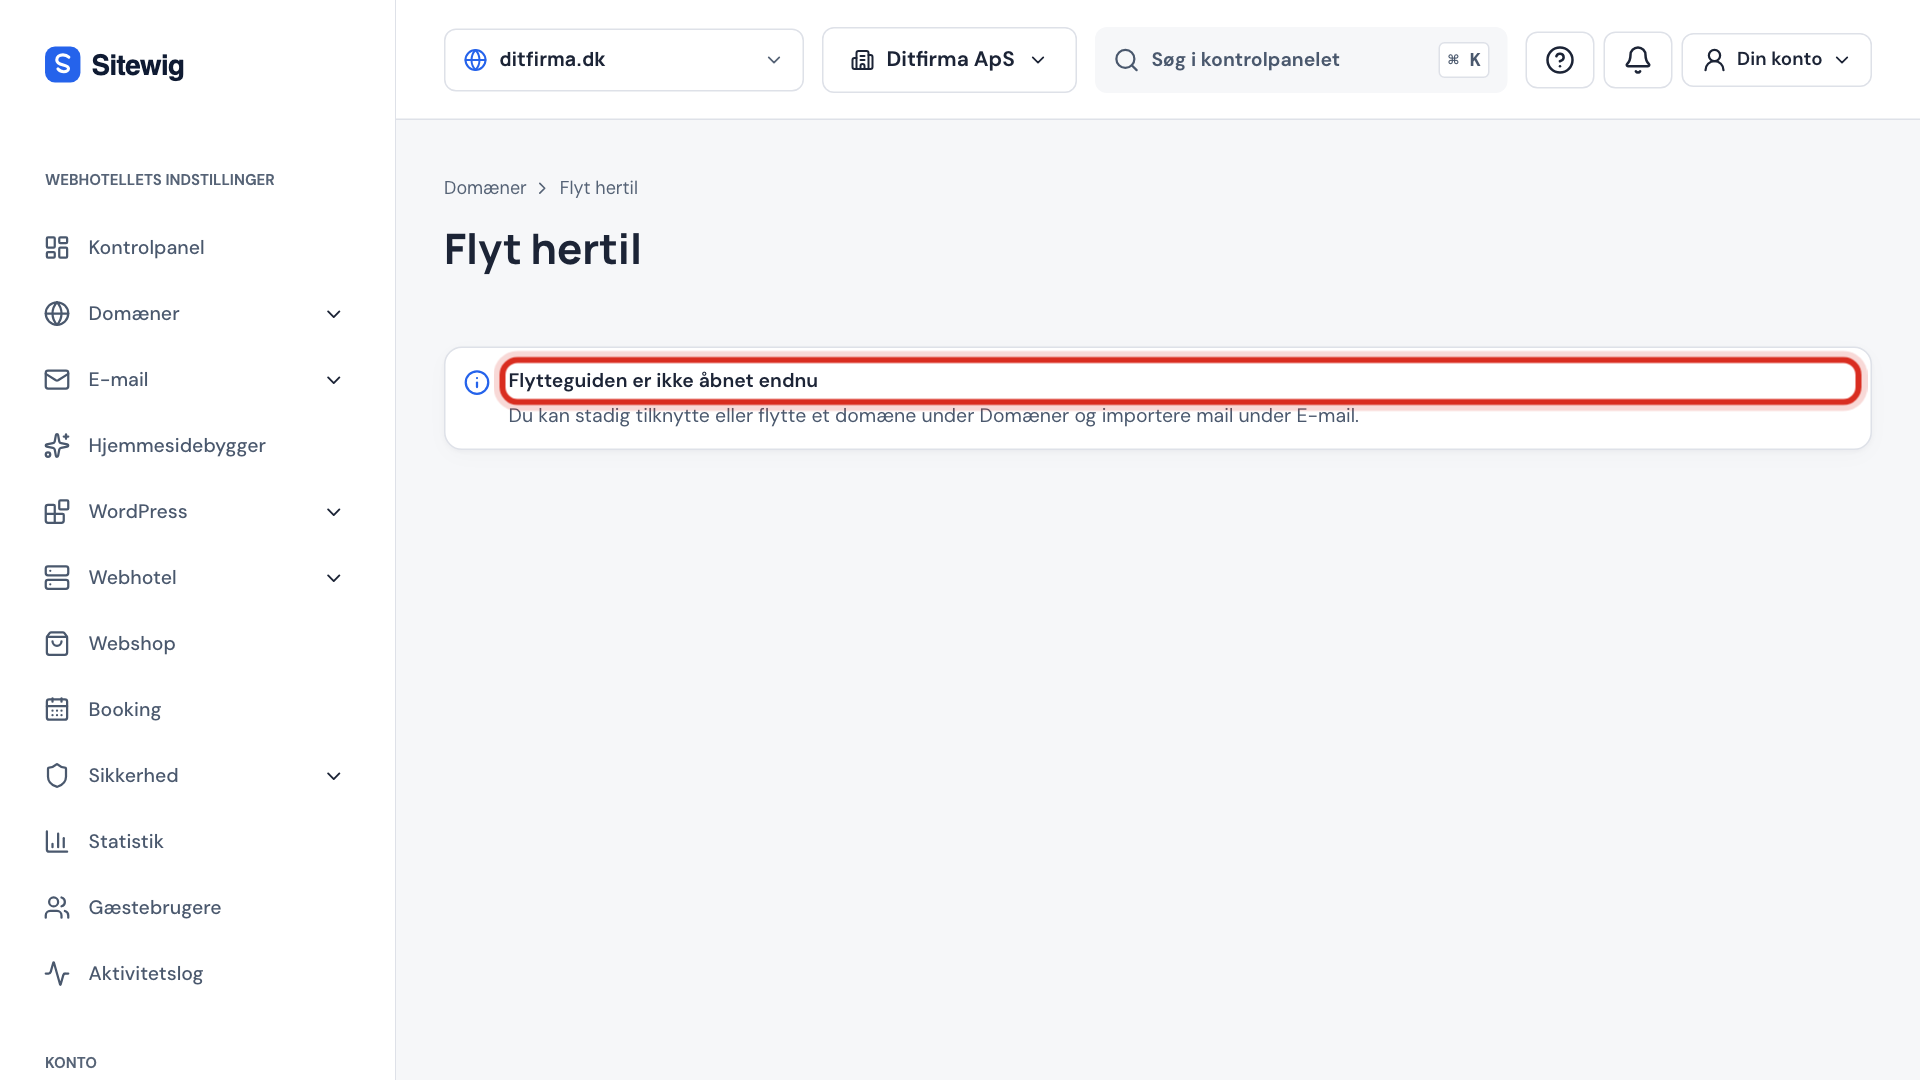
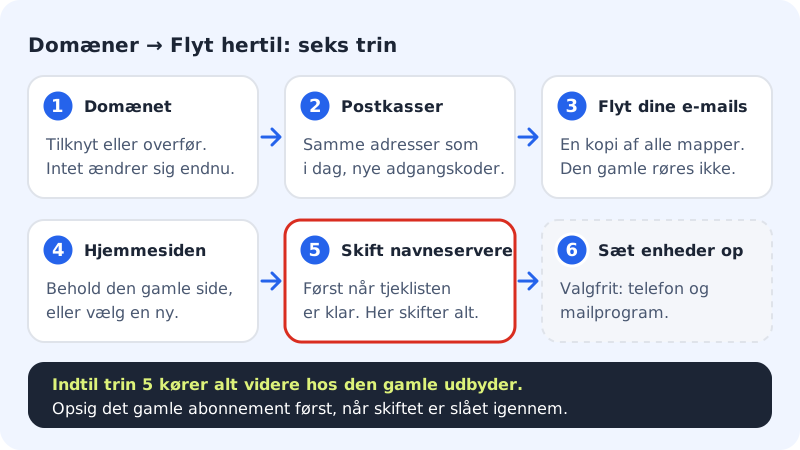
In the control panel you will find the Domains → Move here guide. It gathers the whole move of one domain on one page and takes you through six steps. Each step unlocks when the previous one is done – if it says Available once the previous steps are done., something further up is missing.
Before you begin
- Do not cancel anything yet. Your current web hosting, your email and your domain must keep working until the move is finished and checked.
- Make a list of your email addresses. You need it in step 2. Include aliases and forwarding too.
- Have your sign-in for the old provider ready. You need it to change name servers and possibly to get an auth code.
- Choose a company in the control panel. Domains and mailboxes belong to a company. If you are in your personal workspace, the guide asks you to switch.
Move step by step
Step 1: Choose a plan and sign in
If you do not have an account yet, choose a plan on sitewig.com. The first 3 months are free. Then sign in to the control panel.
Step 2: Open the guide and check the domain
Go to Domains → Move here. Enter the domain in the field Domain to move, e.g.
yourcompany.com, and tap Check the domain. Sitewig only looks up the domain's public DNS – we never sign in at your current provider.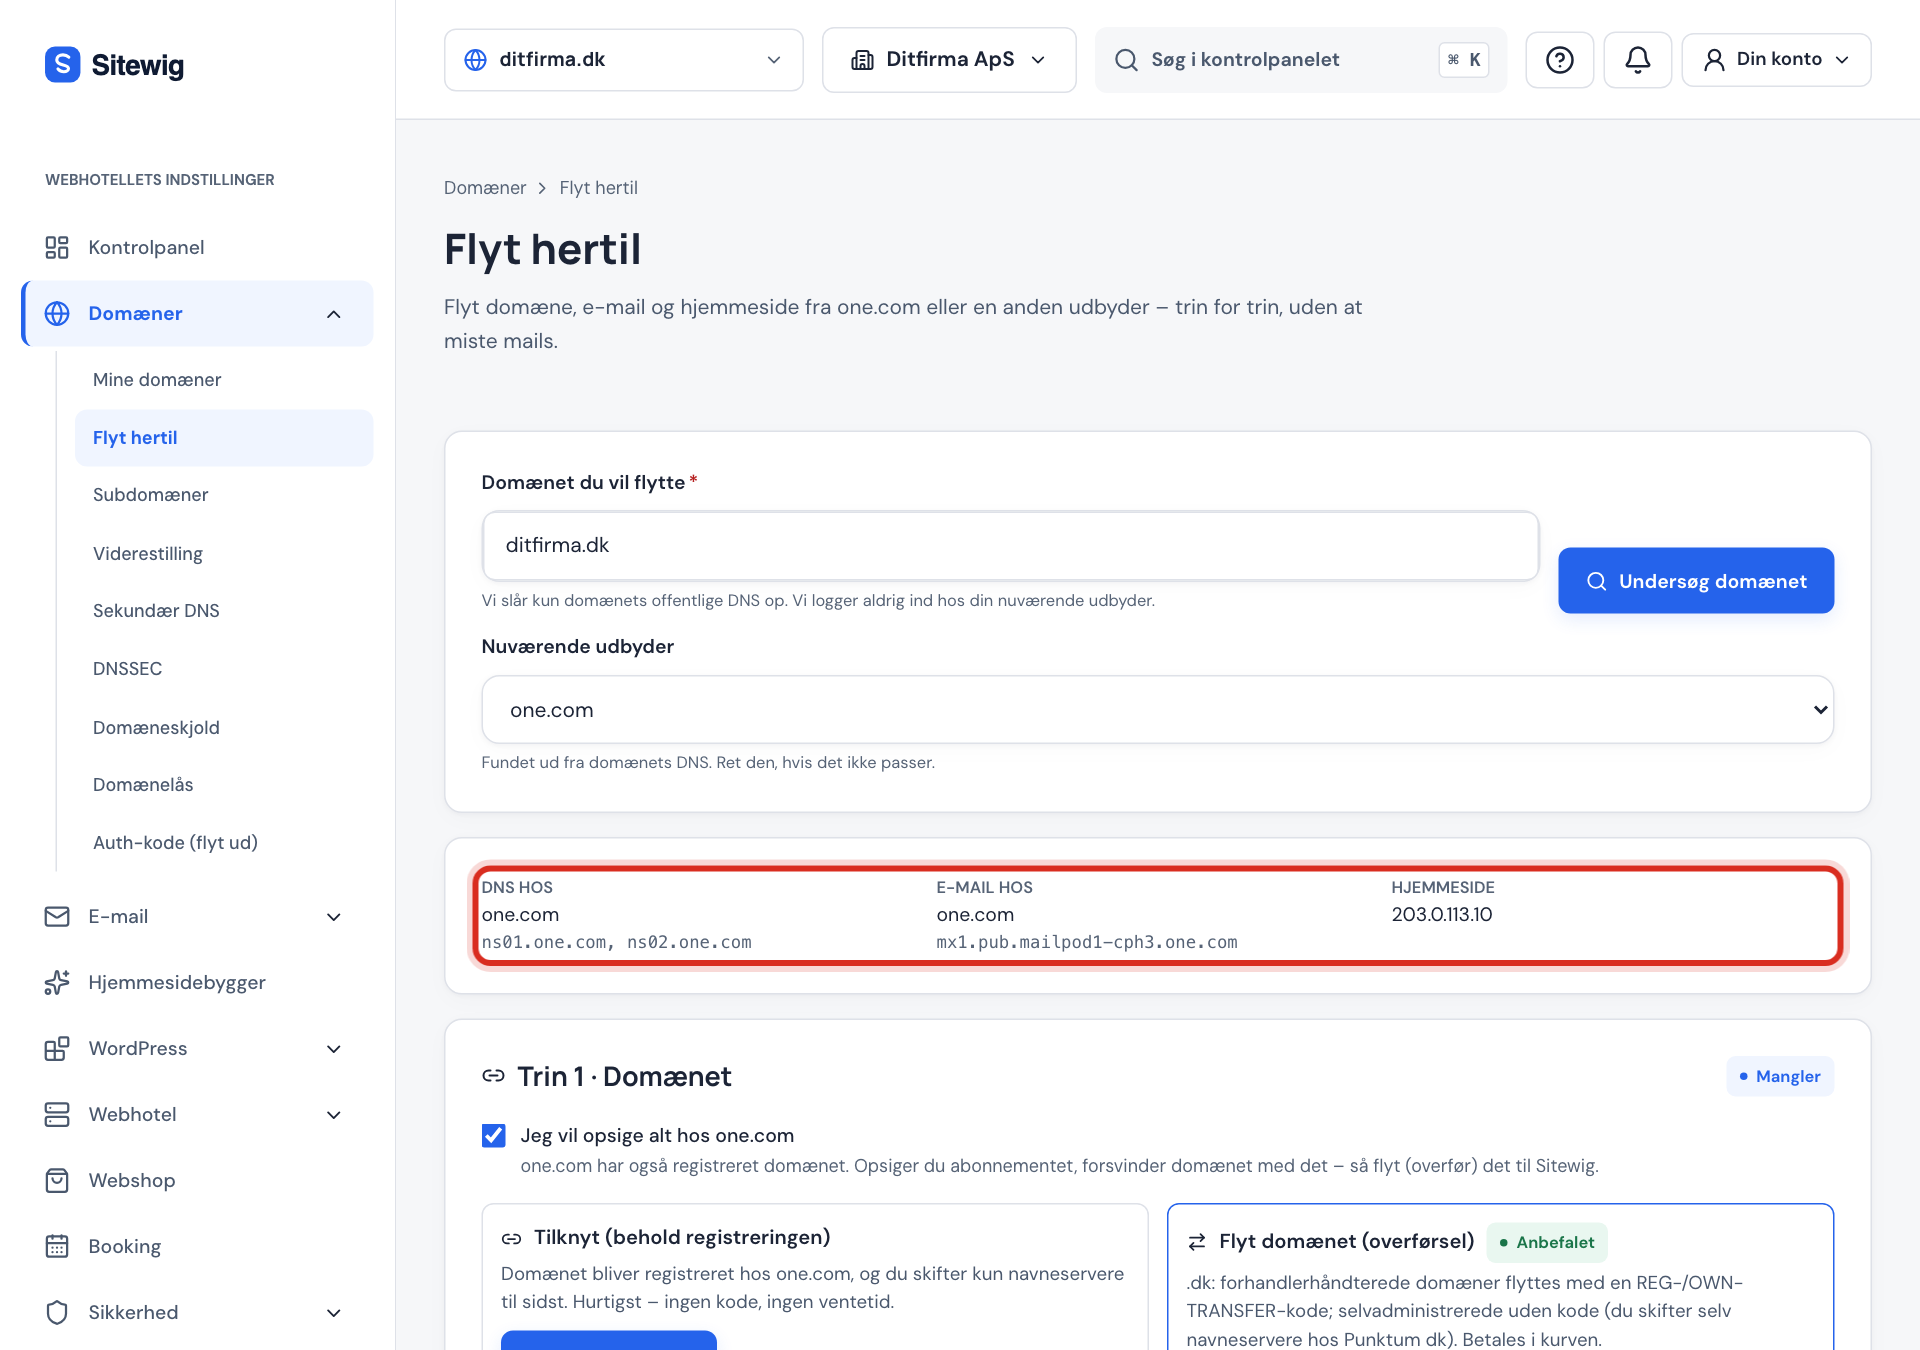
Afterwards you see three fields: DNS at, Email at and Website. Under Current provider is the provider the guide has found. If it is not correct, you can change it.
Step 3: Step 1 – The domain
Choose Attach (keep the registration) or Transfer the domain. If you are unsure, read Should I connect or transfer my domain?. Nothing changes for your visitors yet.
Step 4: Step 2 – Mailboxes
Paste the list of your addresses and create the same mailboxes at Sitewig with new passwords. See Create your mailboxes before you move your email.
Step 5: Step 3 – Move your emails
Start the import of your old emails. It copies all folders, and your old mailbox is not touched. See Import your old emails.
Step 6: Step 4 – The website
Choose what the domain should show after the change: the current website, a Sitewig website or a parking page. See Keep your website or switch.
Step 7: Step 5 – Switch name servers
Go through the Checklist before switching. When everything is ready, change the name servers to
ns1.sitewig.comandns2.sitewig.com. This is where your email and your website start running via Sitewig. See Change name servers without downtime.Step 8: Finish – and cancel at the end
When the guide shows The name servers point to Sitewig, tap Fetch new email in step 3 one more time. Set up phones and email programs in step 6 (optional). Only now do you cancel the subscription with the old provider.
What about a WordPress or other website?
Move here points the domain to your website, but it does not move the files themselves. If you want the website on Sitewig's web hosting, see Move your WordPress site to Sitewig or Move an ordinary website with SFTP. You can easily move email and domain first and the website later.
Frequently asked questions
How long does a move take?
The work in the guide itself usually takes less than an hour. The email import can run for up to 6 hours for large mailboxes, and the name server change usually takes effect within 1–24 hours. If you transfer a domain, it can take a few days at the registry – this does not affect your email if you have created the mailboxes first.
Will my website or email go down along the way?
No, not if you follow the order. Until you change name servers in step 5, everything keeps running with the old provider. Afterwards, Fetch new email catches the emails that reached the old server during the change.
Can Sitewig sign in at my old provider and do it for me?
The guide never signs in at your old provider – you change name servers yourself and get an auth code if needed. If you want help, moving help is free with the web hosting plans. Never send passwords in an ordinary email.
Can I move several domains?
Yes. The guide takes one domain at a time. Finish the first one, and then start again with the next.