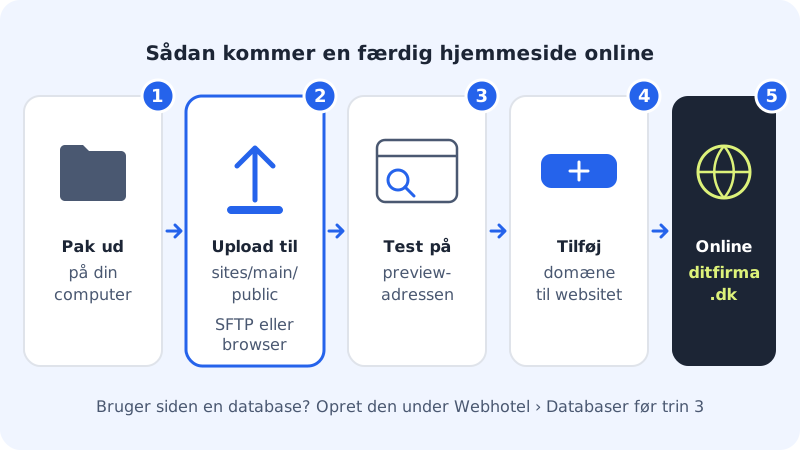
If you have received a finished website from a web designer or made it yourself, the files simply need to be in the right folder on your web hosting. It usually takes 10–20 minutes. If you use WordPress, see move WordPress to Sitewig instead.
Before you start
- You need web hosting at Sitewig and an FTP user.
- If you received the website as a zip file, unpack it on your computer first.
- Find the start page. It is called
index.htmlorindex.php.
Put the website online
Step 1: Connect to the web hosting
Use an FTP program such as FileZilla, or open File manager under Web hosting → Files.
Step 2: Open the public folder
Go to
sites/main/public. This is the folder for your main site. If there are already files there that you do not need, you can delete them.Step 3: Upload the files
Upload the contents of the website's folder – all files and subfolders such as
css,jsandimages. The start page must be directly inpublic.Step 4: Create a database if the website uses one
If the website uses a database (typically PHP websites), create it under Web hosting → Databases and import your data. Then update the connection details in the website's configuration file. The host is
localhost. See databases and PHP.Step 5: Test on the preview address
Open WordPress → Overview, click the website main and open Preview URL under Details. Check the home page, menus, images and forms.
Step 6: Connect your domain
Click Add domain on the website's page and choose your domain. If you do not have a domain at Sitewig yet, see use a domain you already own. Free SSL is set up automatically when the domain points to Sitewig.
Checklist if something does not work
- The home page shows an error:
index.htmlorindex.phpis not directly inpublic. See the folder structure. - Images or CSS are missing: links in the code point to your own computer, e.g.
C:\Users\…, or upper and lower case do not match. The web server distinguishes betweenLogo.pngandlogo.png. - "Cannot connect to the database": check the database name, username, password and the host
localhost. - Redirects in
.htaccessdo not work: Sitewig uses the nginx web server, which does not read.htaccess. See hidden files and errors.
Frequently asked questions
Can I upload a zip file and unpack it on the server?
The safe way is to unpack the files on your computer and upload the contents. If you are used to the command line, you can also work with the files via SSH.
Why do I still see the old website on my domain?
The domain may still point to your old provider, or your browser may be showing a saved copy. Check that the domain is connected to the website, and try in a private browser window.
Can I have several websites on the same web hosting?
Yes. Create an extra website under WordPress → Overview with Create website. It gets its own folder sites/<name>/public and its own domains.